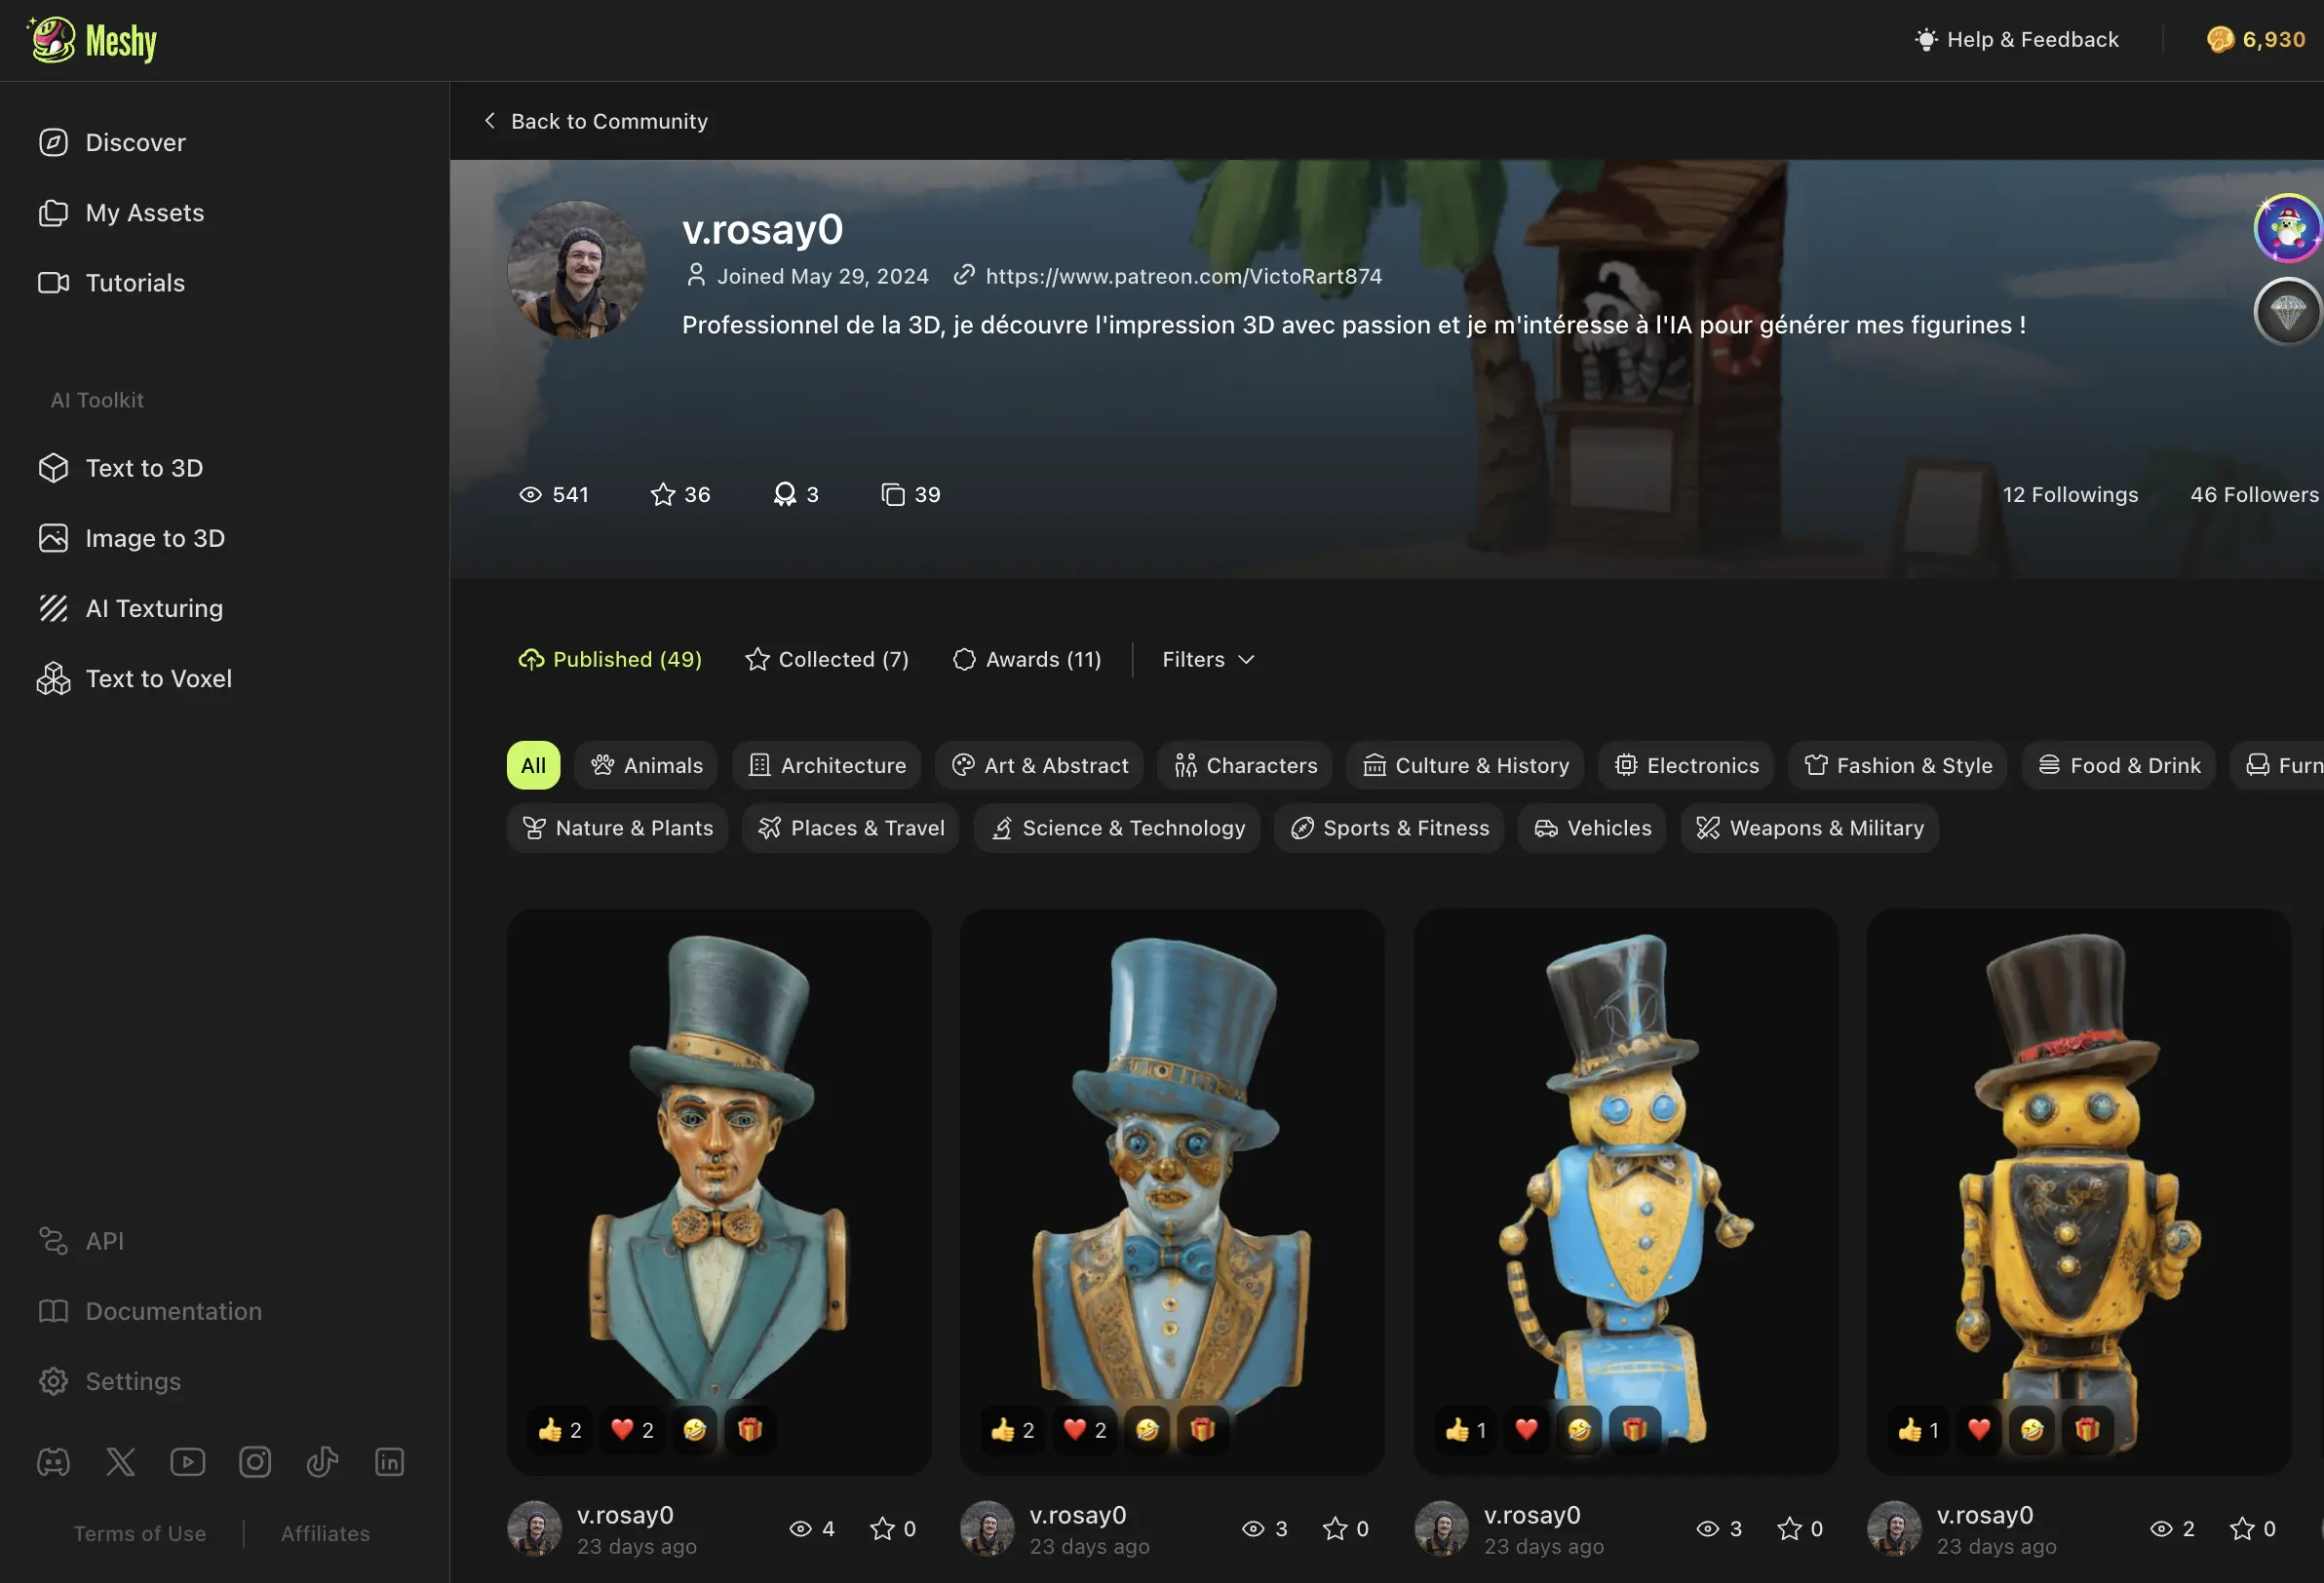
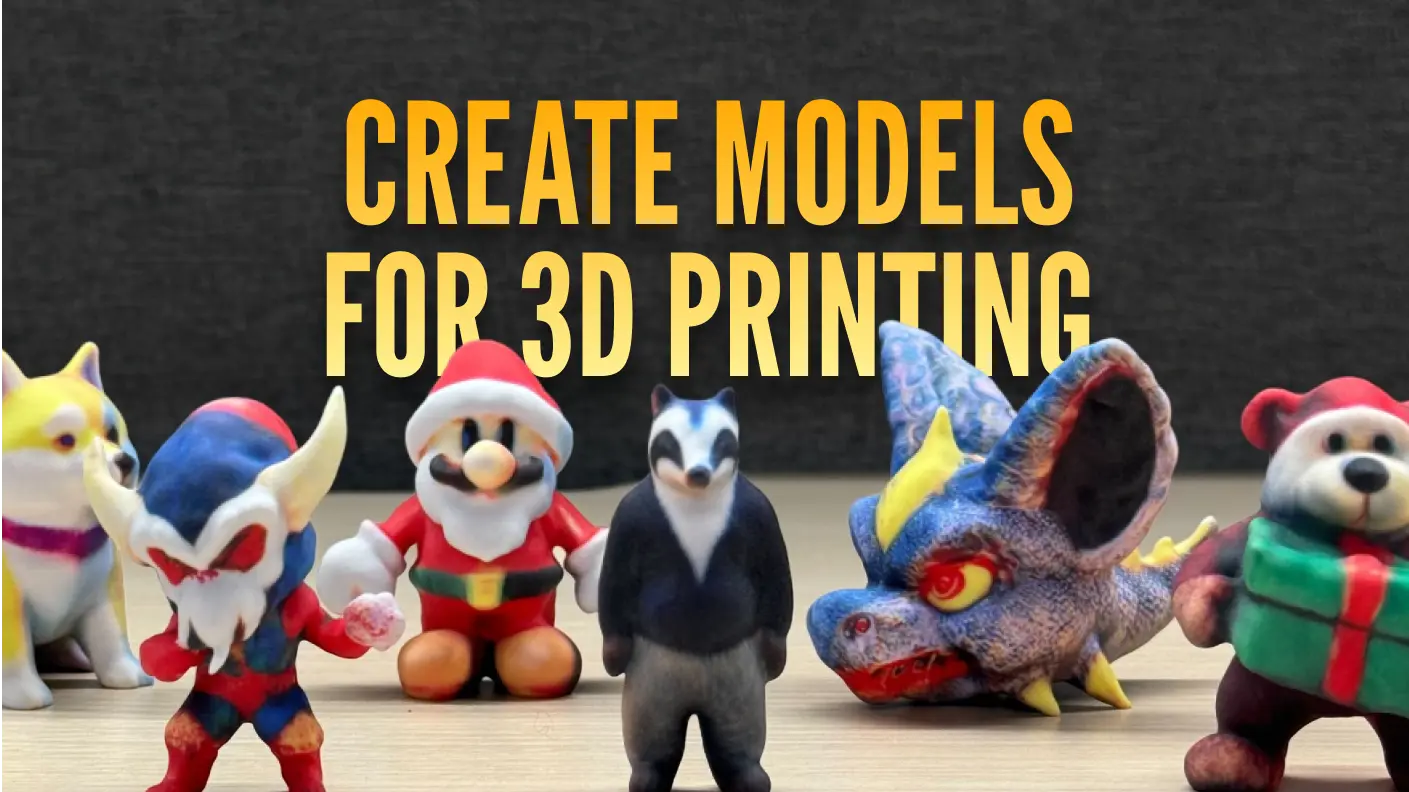
In this blog post, Victor Rosay, an early adopter of Meshy, shares a comprehensive tutorial on how to create a 3D-printed Yokai egg quickly and easily using Meshy.
 3D printing Yokai egg by Victor
Part 1. Generate a 3D Model with Meshy
Have you ever thought about creating a Yokai egg to impress your friends? Maybe not. But now that you're here, I'm sure you're curious about how to do it!
What is Yokai Egg?
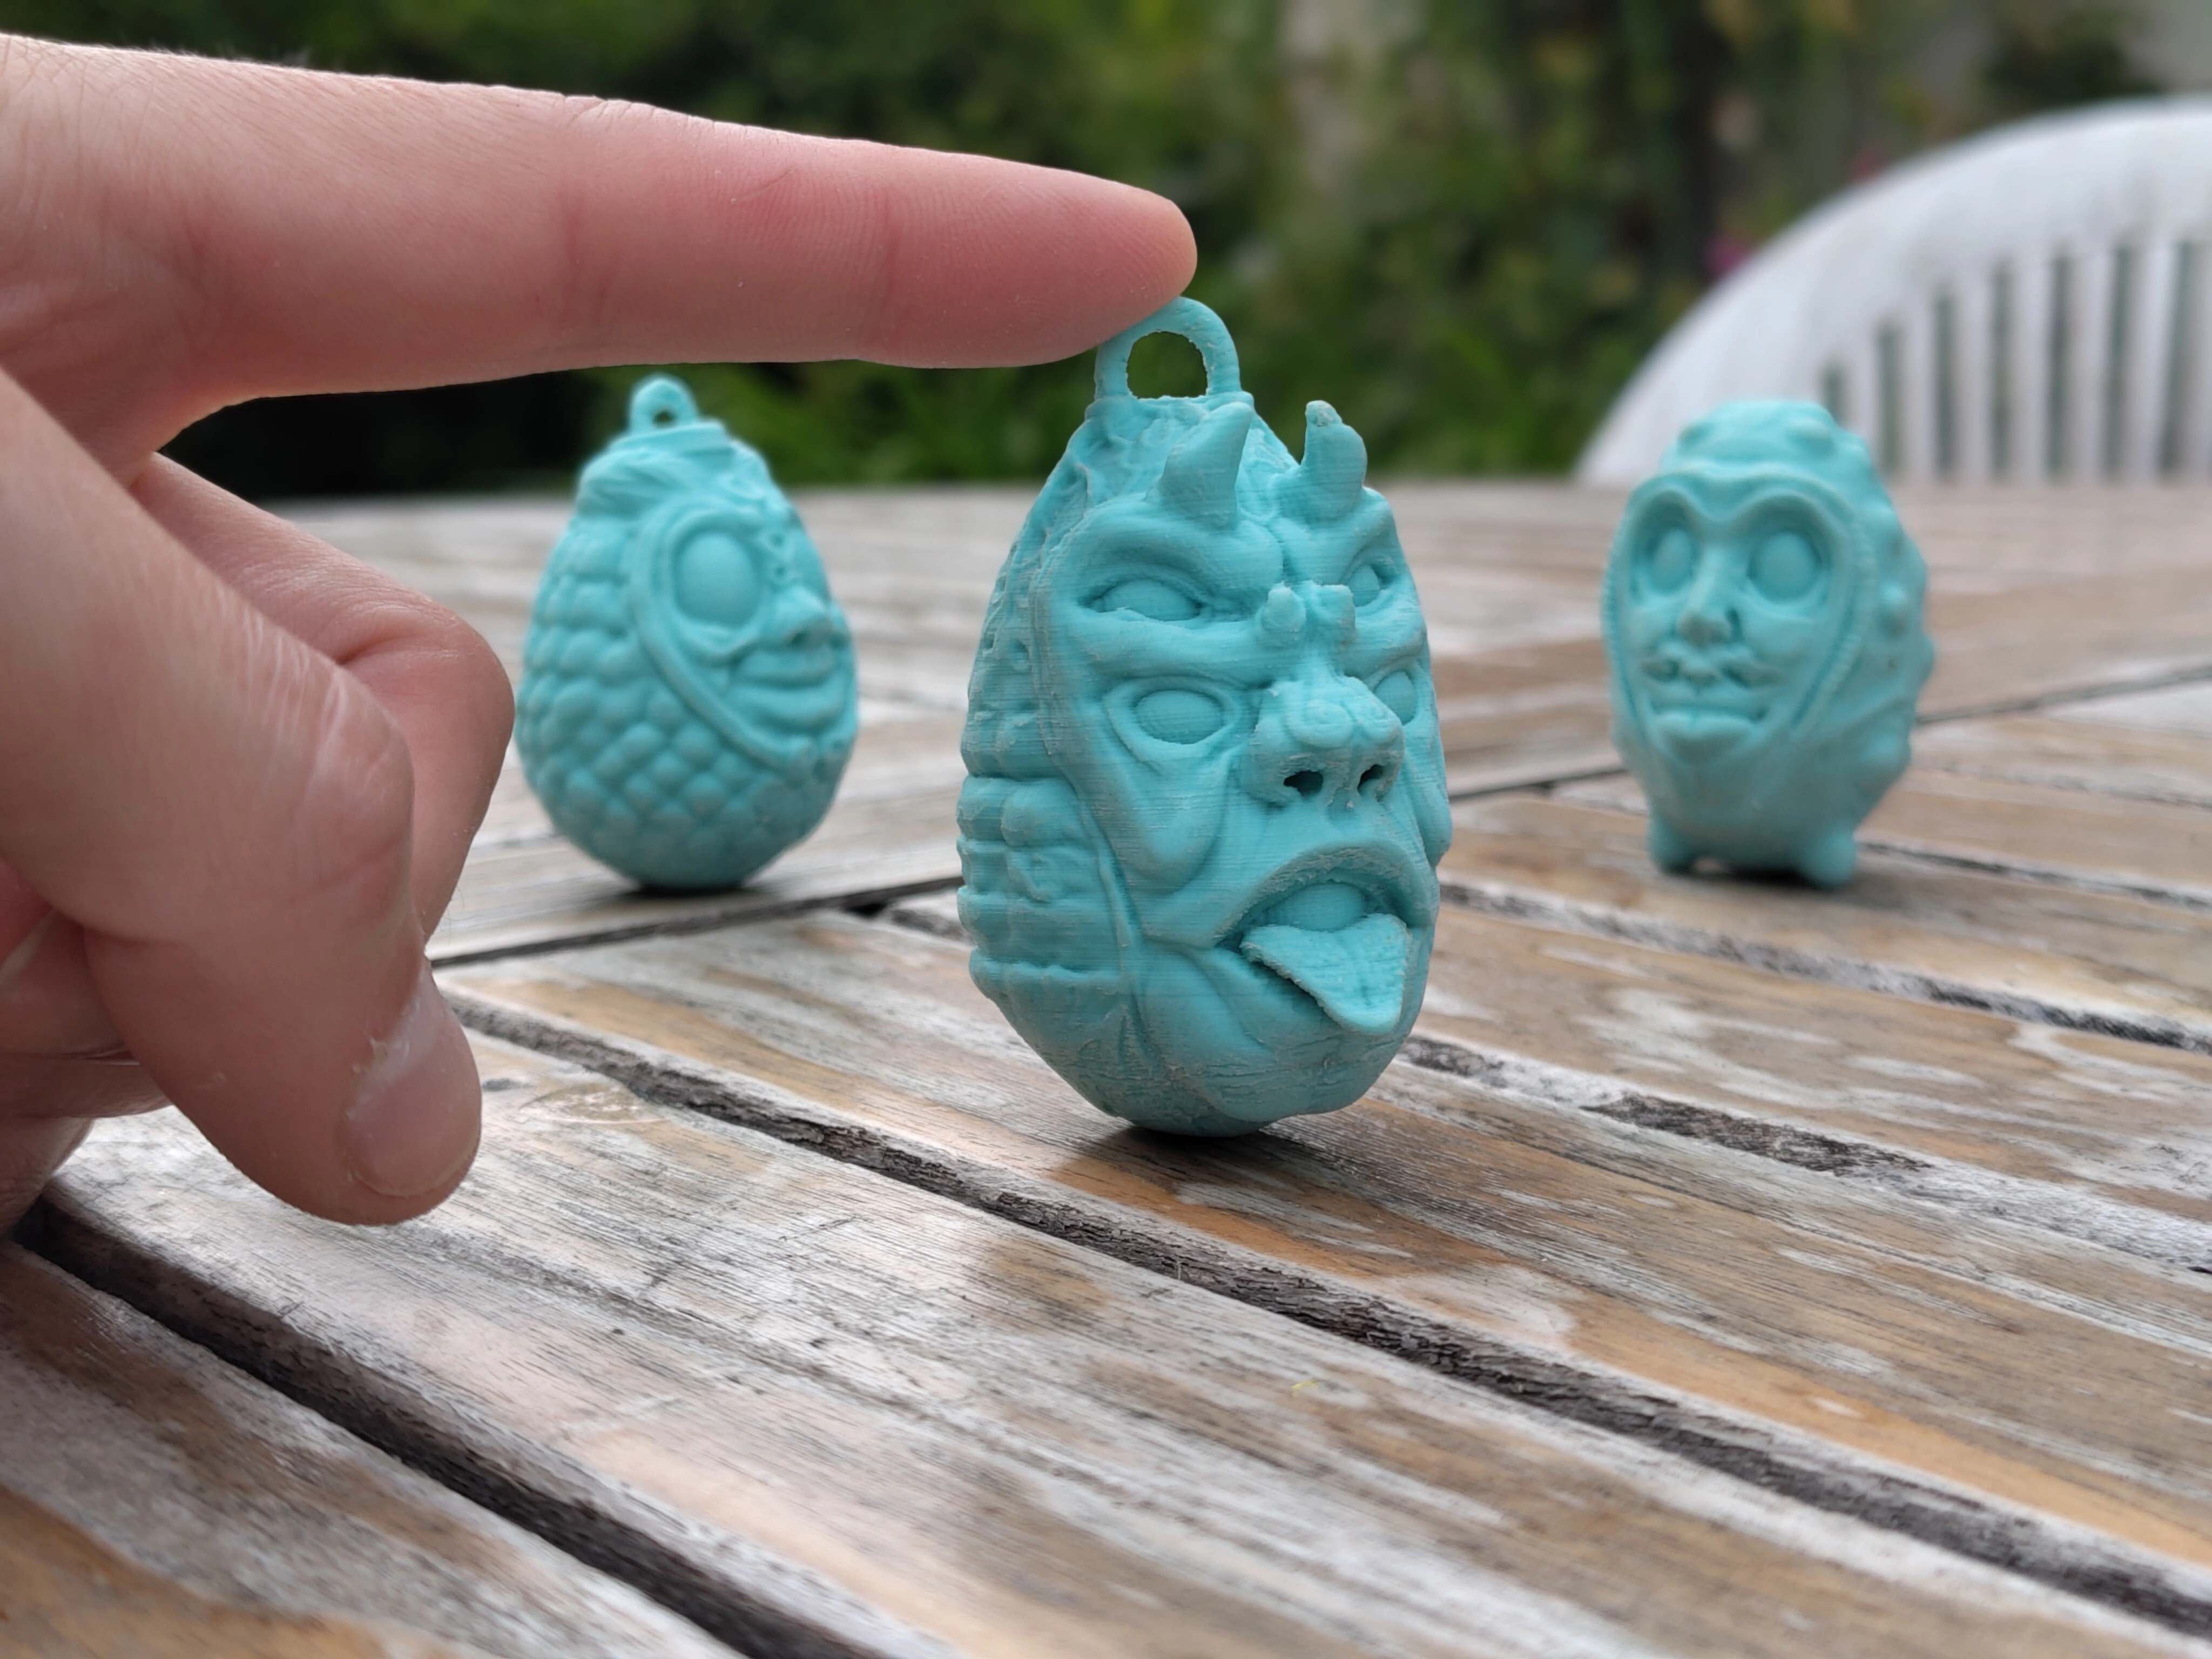
The idea for Yokai eggs came to me after printing a Behelit from the Berserk universe. My mom pointed out that it looked quite sad and suggested I create one with a smile (love you mom <3).
Why Use Meshy for Generating?
The idea is to use procedural generation to streamline the iteration phase and enrich your research! Thus, Meshy will generate random shapes for us, allowing us to bring our ideas to life with our sculpting skills. This is similar to using an object generator.
We will also use AI textures generator to capture very fine details. These details within the textures will help us create precise and easy-to-paint geometry without having to spend a fortune on 3D brush packs!
We get to choose the egg we like the most to start sculpting.
How to Choose an Art Style in Text-to-3D?
There are generally two approaches:
Choosing the Sculpture Style
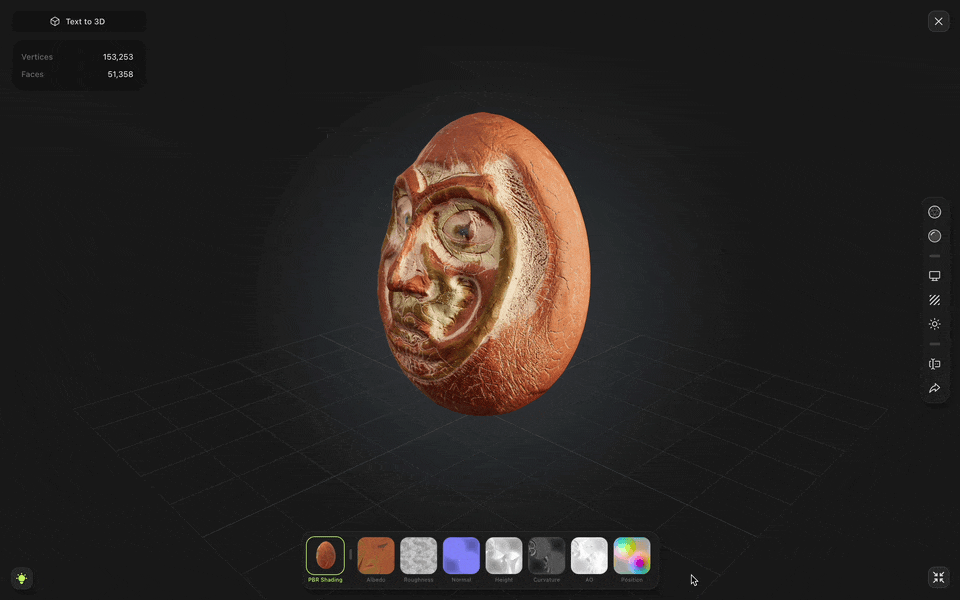
- ✅ Meshy generates a Height Map directly!
- ❌ The mesh is triangulated.
- ❌ Meshy does not allow modifying textures.
Choosing Any Other Style
- ❌ Meshy does not generate a Height Map directly!
- ✅ You can generate the mesh in Quads.
- ✅ Meshy allows modifying textures.
Keep in mind that if you want to use the Sculpture style, you will need to subdivide a triangulated mesh, which is very resource-intensive. If you use another style, you will need to generate a Height Map yourself, from the diffuse or normal map. You can use software like Materialize or any other solution.
Text Prompt
In our prompt, we will start by providing context to the generator: Essentially, we will define the project and the usage of the 3D model.
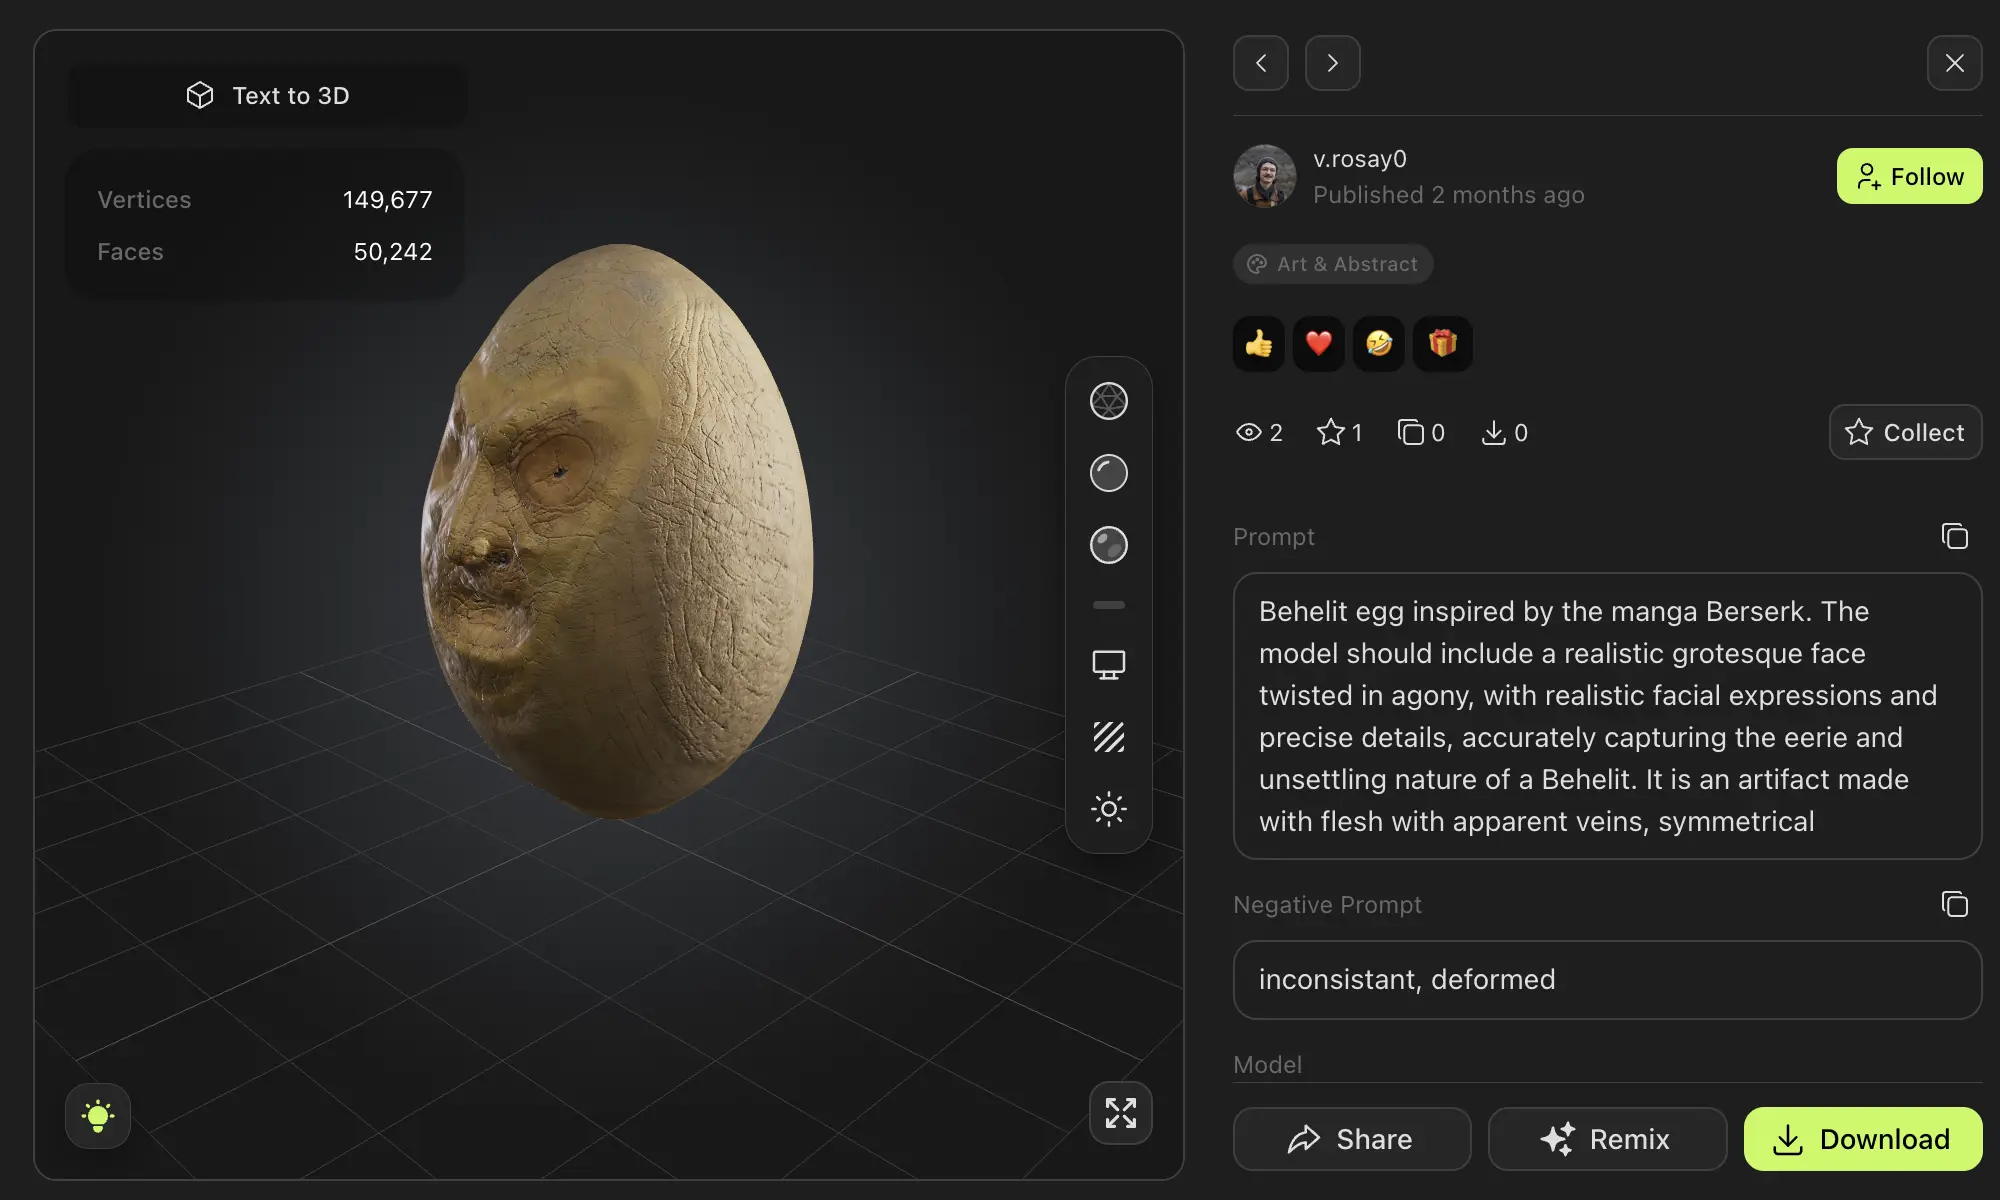
Detailed 3D printable model of a Behelit egg inspired by the manga Berserk
Next, we will specify more precisely what we want in our 3D model. In this example, I didn't focus on a specific facial expression because I wanted to use procedural generation to help me find inspiration.
The model should include a face twisted in agony, with realistic facial expressions and precise details
According to my tests, Meshy struggles to recognize specific facial expressions. However, I wanted the face to be detailed enough in the geometry of the object rather than in the texture.
You can also explore the Prompt Library to enrich your prompt.
The Prompt Library allows you to specify a style, materials, or certain types of details. These prompts, optimized and designed by the Meshy team, are quite reliable and will help you achieve better results! You also have the option to add Negative Prompts. Negative prompts are used to identify elements you do not want the generator to include!
Part 2. Add Details to the Model in Blender
Blender is a very practical software suite with really useful sculpting and retouching tools. For modeling organic shapes that don't have complex mechanisms, it's ideal! Additionally, Meshy offers the option to export your creations as .blend files with the texture files included in the project!
To get started, you need to configure Blender a bit for 3D printing. The first thing to do is change Blender's units. By default, Blender is set to "meters," which is a bit too large for 3D printing. We'll change it to millimeters.
The second thing we can do is install the 3D Print Toolbox addon. This addon gives us access to specialized tools for 3D printing that aren't necessarily provided by the software. Once that's done, you're ready to go.
The goal will be to use the Height Map to generate the details of our 3D model. You can adjust the displacement strength and the number of subdivisions to choose the level of detail that suits you.
Part 3. Make the Model more Appealing
In this final chapter, we will explore how to sculpt on top of a 3D mesh while preserving UVs and prepare our model for 3D printing!
We will be working with a lot of geometry, so you might need to apply your modifiers. Duplicate your model before applying them; you never know when you might want to go back!
Roughing Out the Anatomy!
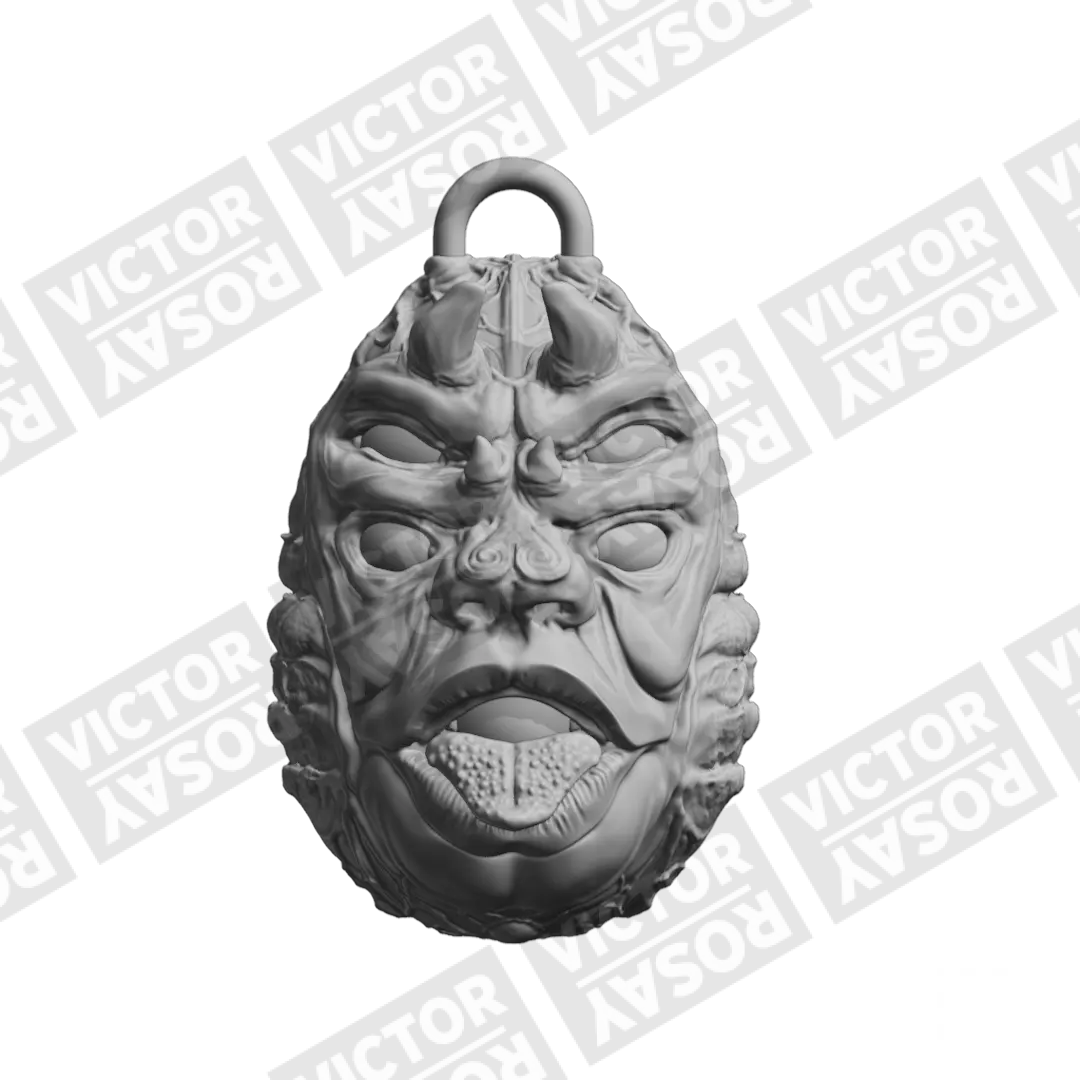
First, we'll use the texture map to help identify the volumetric elements of our model: the placement of the eyes, mouth, ears, etc. You can make a small diagram to help identify these elements.
To explore the shading options in the viewport, select a matcap you like and choose the "texture" option. This will allow you to work while visualizing the texture map directly on your model.
Two other shading options I like are Ridge and Valley. These shader elements are based on cavity shading to indicate the depth of your brush strokes.
If your computer struggles with high levels of active subdivisions, you can disable or apply them (both actions will free up RAM), and it won't affect your work! For this stage, you won't need a lot of geometry, so you can save the subdivisions for later.
To preserve the UVs while working, make sure to disable the Dyntopo option! This feature allows brushes to modify your geometry and can destroy your UVs. Dyntopo generates geometry based on the view, i.e., the distance of the camera from the object, or according to a density you've set.
Dyntopo is very handy in some cases, especially at the beginning of a project to create large volumetric elements like horns, legs, arms, a tail, or a strand of hair. Another use is for creating fine and detailed elements, like skin pores, for example.
Useful Brushes
The brushes that will be useful are more traditional ones:
- The Draw brush (I don't use it often, except with textures).
- The Clay brush is very practical and easy to use for quickly defining elements.
- The Clay Strips brush works almost like Clay but is very textured. I particularly like it. When used correctly, you can quickly create interesting details like certain skin or muscle details.
- The Blob brush quickly adds a lot of volume. Coupled with the Scrape brush, it can be used to sculpt elements like the contours of the eyes or lips.
- The Grab brush is great for making small adjustments and correcting proportions.
- The Snake Hook brush can quickly add material to shape a nose, for example, when used sparingly.
Explore your brushes, see how they react, and you'll find your way of working. It's very fun. Like in drawing, it's the movement of your brush strokes that will define your shapes. The more you master anatomy, the more accurate and interesting your result will be.
To ensure your 3D print will be perfect, you can use 3D-Print Toolbox. It's a free add-on that helps you check your model. If you're unsure, click Make Manifold. This will fill in the missing faces of your 3D model. Add a support to attach a keyring, and you're done!
Personally, I stop when I'm completely satisfied with the result. The more precise and controlled the details, the more enjoyable it will be to paint with acrylics, using glazing and dry brushing techniques to achieve subtle and varied effects!

Discover Meshy Community
Join the community of 3D enthusiasts and start creating today. Dive into the world of 3d art and unlock your potential with Meshy.