Meshy is a revolutionary tool for 3D printing that allows users to create free 3d models from photos and text descriptions. This tutorial will explain how to create a 3D model using Meshy and explore other tools and processes necessary to prepare your model for 3D printing.
Step 1: Generate a 3D Model
When you start Meshy, you can begin by creating a new 3D model using AI. Meshy enables users to generate models from text inputs or photos, making it easy to design complex shapes or patterns and leverage 3D modeling for e-commerce needs. This feature is particularly useful for those who are not well-versed in traditional 3D modeling software. Meshy's AI 3d model generatorfor 3D printing can create a model of the object simply by describing it. After entering the prompt, you can select the corresponding style and click "generate" to produce four preview models. You can then select one of the preview models and click "refine" to generate the final model with more details.
 Generate 3D models using Meshy
Step 2: Model Preparation Using Other Tools
The models generated by Meshy can be directly exported as .stl files, a common format in 3D printing.
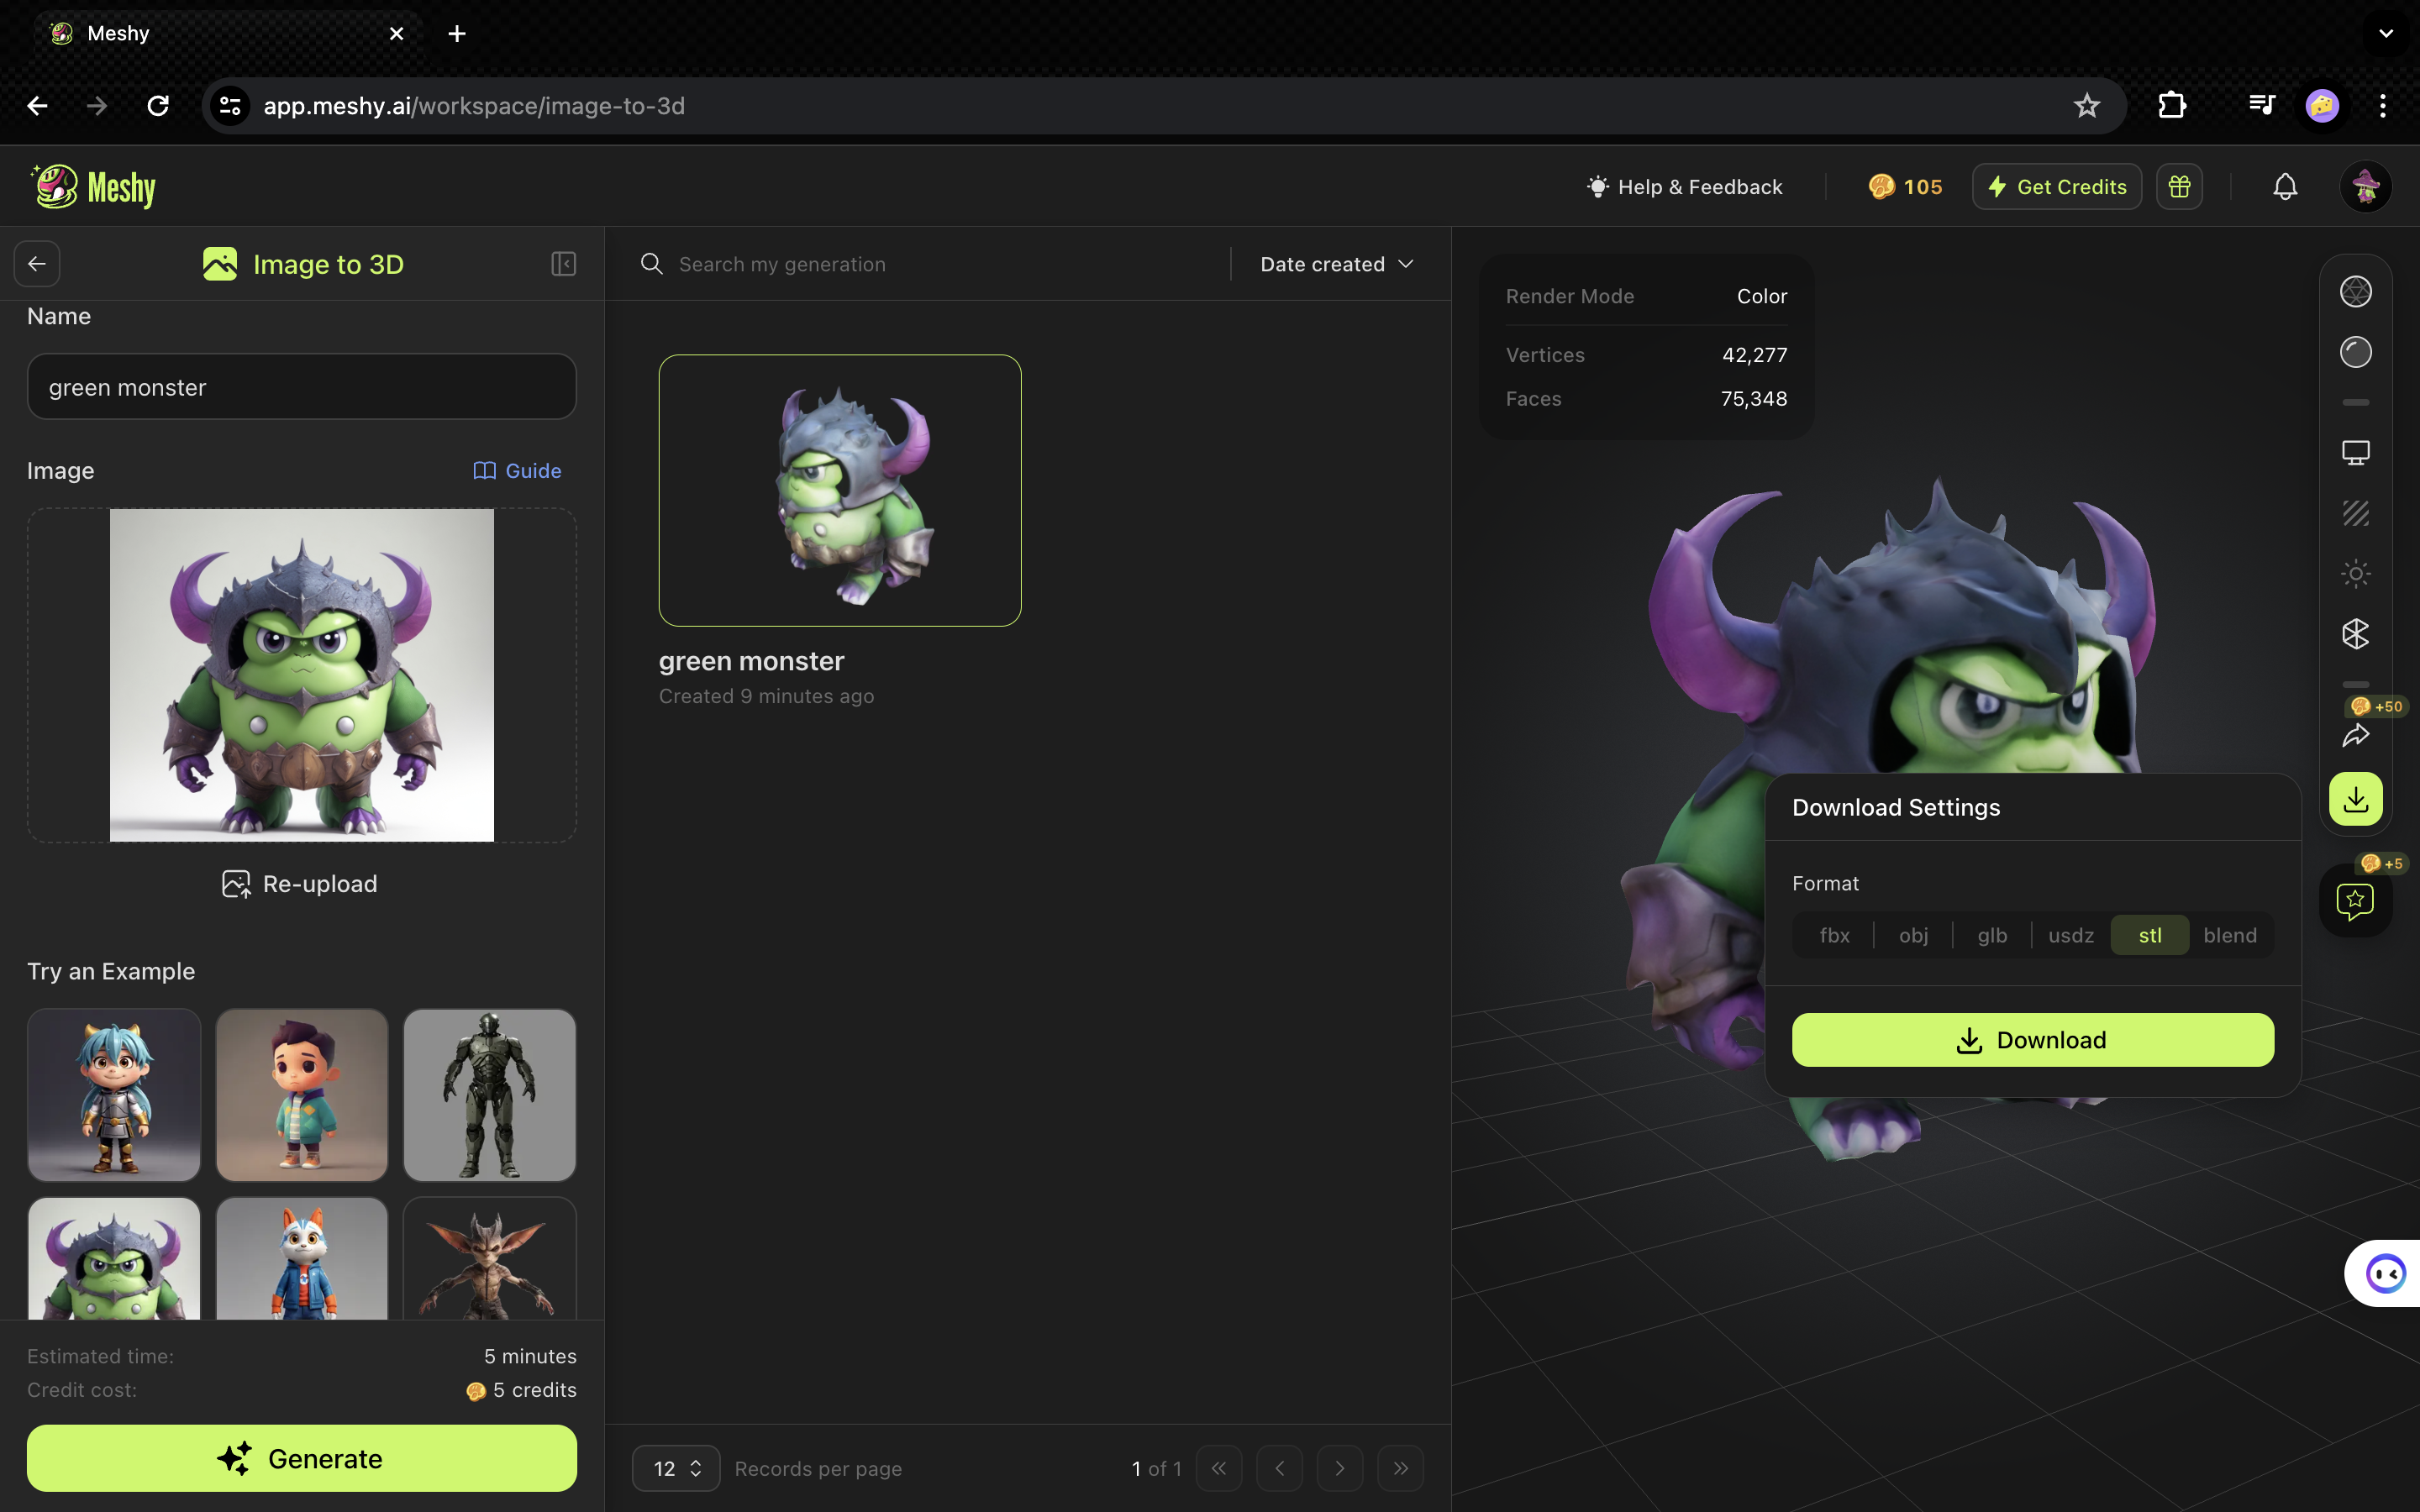 Download 3D models
You can either print the files directly or perform further editing. Recommended tools include:
Blender: A free and highly flexible software for 3D modeling that allows users to adjust mesh density, scale the model, and optimize it for 3D printing. Blender has many tools for sculpting, painting, and polishing the model to achieve the desired result.
MeshLab: A free, open-source software for processing and editing 3D triangular meshes. It is particularly useful for mesh analysis, repair, and conversion of mesh formats.
Tinkercad: A simple web-based application for basic geometric operations and combining several models. It is suitable for beginners and those who need to make small modifications to the document.
Step 3: Mesh Assessment and Reconstruction Using Other Tools
After exporting your textured model from Meshy, use tools like Blender or MeshLab to check for mesh issues such as non-manifold edges and intersecting faces. Non-manifold edges, which are connected to more than two faces, can cause problems during printing. These tools provide the ability to correct these issues, ensuring your model is ready for 3D printing. Blender's “3D Print Toolbox” add-on can search for problems and solve them. MeshLab offers several filters and tools to clean up the mesh, such as removing extra faces, filling gaps, and optimizing the mesh.
Step 4: Including Supports Using 3D Printing Software
Software like Cura or PrusaSlicer can design the necessary supports for your model, including supports for overhangs and complex structures to ensure successful printing. Rafts are required for printing parts of your model not in contact with the build plate. In Cura, you can change the support type, orientation, and number of layers. PrusaSlicer offers similar options to adjust supports according to the model and the type of printing you are performing.
Step 5: Setting the Print Settings Using 3D Printing Software
In your 3D printing software (e.g., Cura, PrusaSlicer), set the following parameters to ensure a successful print:
Layer Height: Controls the resolution and detail of the printed object. Lower layer heights provide more detail but take longer to print, while higher layer heights are faster but reduce print quality.
Infill Density: Determines the strength and mass of the print. Higher infill density results in a stronger print but uses more material and time.
Print Speed: Affects the time taken and quality of the prints. Higher speeds reduce print time but may affect quality. Slower speeds improve quality but increase print time.
Support Settings: Modify support generation and placement, including thickness and other characteristics, to facilitate easier support removal and better print quality.
Step 6: Preparing the 3D Printer
Before printing, inspect the 3D printer to ensure all components are in good condition. Bed leveling ensures the printer bed is flat and at the correct distance from the nozzle. Calibration sets the printer to the correct settings. Load the appropriate filament matching the material and color of the desired model. Common filaments include PLA, ABS, and PETG, each with its properties and recommended settings.
Step 7: The Printing Process
Transfer the G-code file to your 3D printer and start the printing process. Monitor the print to address issues like filament jamming or adhesion problems. If problems occur, adjust the printer settings to ensure a successful print.
Step 8: Post-Processing (Optional)
After printing, carefully remove any support structures using pliers or a hobby knife. Sanding rough edges can smooth the print's surface. Other finishing processes include painting or applying a surface coating to enhance the model's appearance and functionality.
Key Takeaways
Meshy can easily generate 3d models from text or photos. By using additional software for mesh editing, analysis, and preparation, you can achieve high-quality 3D prints. Integrating Meshy into your 3D printing process ensures excellent results when modeling, and combining it with other tools maximizes its potential. This tutorial provides steps to ensure your 3D prints are of the highest quality, transforming your digital creations into reality.
Follow Meshy
If you're interested in exploring more about Meshy, check out our social media platforms. Learn how AI 3D model generators can transform your creative workflow:
- Subscribe to our YouTube channel for the latest tutorials.
- Follow us on Twitter for news, tips, and inspiration.
- Join our Discord community to connect with other 3D artists.