Анімація — це не просто рухомі картинки — це оживлення ідей, перетворення статичних зображень у справжні історії. Від ручних ескізів до високоякісної CGI, це ремесло, яке постійно розвивається, пропонуючи безліч способів для створення та вираження. Але як створити анімацію? Це залежить від типу анімації, яку ви прагнете створити.
У своїй основі анімація слідує простому процесу: плануйте свою ідею, створюйте ключові кадри, вдосконалюйте рух і додавайте завершальні штрихи, такі як кольори, освітлення або звук. Незалежно від того, чи це класична 2D, захоплююча 3D, чи чарівна стоп-моушн, кожен стиль має свій підхід — але магія полягає в тому, щоб зробити її природною, а розповідь — живою. Цей гід проведе вас через процес створення анімації та основне програмне забезпечення для анімації.
Як створити анімацію?
Анімація поділяється на п'ять основних типів: 2D анімація, 3D анімація, стоп-моушн, графіка руху та анімація з підтримкою AI. Перші три є найбільш поширеними, і кожен має свій унікальний процес і інструменти. У цьому пості я розповім, як створюється кожен тип, яке програмне забезпечення вам знадобиться, і дам кілька корисних порад для початку. Якщо ви хочете зануритися в анімацію, цей гід допоможе вам зробити перший крок — і, можливо, навіть створити свій перший проект!
2D Анімація: Ручні ескізи зустрічаються з цифровими технологіями

2D анімація — це оживлення малюнків у плоскому, двовимірному просторі. Згадайте класичні фільми Disney, аніме або сучасні веб-анімації — кожна з них створена шляхом швидкого відображення послідовності зображень для створення ілюзії руху.
Традиційна 2D анімація створювалася вручну, кадр за кадром, але цифрові інструменти зробили процес швидшим і ефективнішим, зберігаючи при цьому ручну майстерність. Незалежно від того, чи це фільми, ігри або соціальні медіа, 2D анімація залишається одним з найпопулярніших стилів в індустрії.
Ось детальні кроки для створення 2D анімації:
- Почніть зі сторіборду: Думайте про сторіборд як про комікс, який відображає ключові сцени, персонажів і дії. Він допомагає візуалізувати потік вашої анімації до того, як ви почнете рух. Кожна панель представляє ключовий момент вашої анімації, показуючи позиції персонажів, вирази та взаємодії. Цей крок важливий для планування кутів камери, темпу та розповіді без витрати часу на непотрібні кадри.
- Створіть ключові кадри: Ключові кадри — це основні пози або положення, які визначають рух. Уявіть їх як "контрольні точки" вашої анімації. Наприклад, якщо персонаж стрибає, ключові кадри включатимуть присідання перед стрибком, найвищу точку в повітрі та приземлення. Ці кадри встановлюють основний рух, допомагаючи аніматорам зосередитися на важливих діях перед заповненням деталей.
- Додайте проміжні кадри: Щоб зробити рух плавним, потрібно створити проміжні кадри, які заповнюють прогалини між ключовими кадрами. Цей процес, званий "твінінгом", можна виконати вручну в традиційній анімації або автоматизувати в цифрових інструментах, таких як Adobe Animate або Toon Boom. Чим більше проміжних кадрів ви додасте, тим плавніше буде виглядати анімація, але важливо знайти правильний баланс, щоб уникнути зайвого навантаження.
- Очистіть і додайте кольори: Коли рух виглядає добре, очистіть свої ескізи, вдосконалюючи лінії та видаляючи будь-які грубі краї. Використовуйте цифрові інструменти, такі як Photoshop, Krita або Clip Studio Paint, щоб створити чисті контури. Потім заповніть кольори, переконавшись, що зберігаєте послідовну палітру, яка відповідає стилю вашої анімації.
- Додайте тіні та ефекти: Тіні додають глибини вашій анімації, створюючи ілюзію освітлення та форми. Використовуйте тіні, підсвічування та градієнти, щоб покращити вигляд персонажів і фонів. Додаткові ефекти, такі як розмиття руху, сяйво або текстури, можуть зробити анімацію більш відшліфованою та професійною.
- Синхронізація звуку та фінальні штрихи: Звук є важливою частиною анімації — фоновий музичний супровід, звукові ефекти та озвучення оживляють все. Синхронізуйте аудіо з рухами персонажів, переконайтеся, що синхронізація губ відповідає діалогам, а кроки збігаються з анімацією ходьби. Відрегулюйте остаточний таймінг, додайте переходи та внесіть необхідні корективи перед експортом вашої анімації.
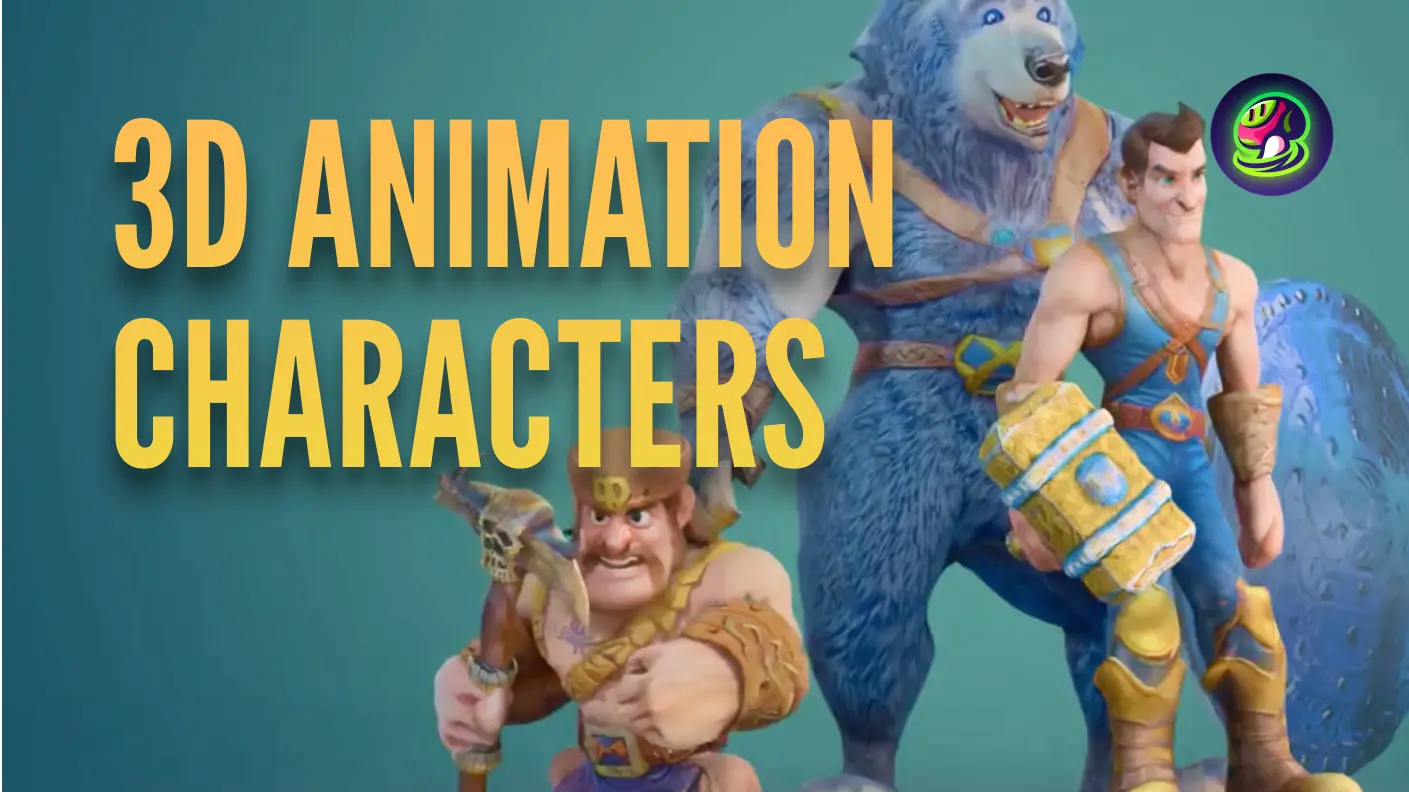
3D Анімація: Від моделювання до рендерингу

3D Анімація вводить новий вимір у розповідь, використовуючи передові технології для створення реалістичних візуальних вражень. Художники створюють цифрові моделі за допомогою полігональних технік, які потім анімуються через ригінг — процес, що забезпечує віртуальний скелет для руху. Цей підхід, підсилений комп'ютерною графікою, дозволяє створювати великі, захоплюючі світи, які вражають глядачів своїми складними деталями та реалістичною динамікою.
Ось керівництво зі створення 3D Анімації:
- Моделювання: 3D моделювання — це процес створення цифрових об'єктів за допомогою полігонів у програмному забезпеченні для моделювання як Autodesk Maya, ZBrush або Blender. Якщо ви новачок у 3D моделюванні, ви можете використовувати Meshy. Ці форми розміщуються на 3D сітці для формування детальних моделей. Після завершення базової моделі вона переходить до текстурування, де художники додають поверхневі деталі, такі як шкіра, тканина або метал, щоб оживити її.
- Ригінг: Тепер, коли у вас є модель, потрібно дати їй "скелет", щоб вона могла рухатися. Це і є ригінг. Ви налаштовуєте кістки та суглоби всередині моделі, як струни у ляльки. Таким чином, ви можете змусити вашого персонажа згинати руки, ходити або навіть виконувати складні рухи — все це зберігаючи природність руху.
- Анімація: Це найцікавіша частина, де все починає рухатися! Ви встановлюєте ключові кадри, які є основними позами або моментами в дії, а програмне забезпечення заповнює рух між ними. Ви налаштовуєте таймінг, швидкість і плавність, щоб усе виглядало гладко та реалістично. Незалежно від того, чи це простий цикл ходьби, чи дика екшн-сцена, анімація оживляє вашу модель.
- Текстурування та освітлення: Тепер, коли рух встановлено, настав час зробити вашу сцену приголомшливою. Текстурування — це як фарбування вашої моделі кольорами та деталями, як зморшки на одязі або блиск металу. Потім приходить освітлення, де ви додаєте світло для створення настрою — чи це яскраво та сонячно, чи похмуро та драматично. Цей крок надає вашій анімації атмосферу та глибину.
- Рендеринг: Останній крок! Коли все на місці, ви запускаєте рендеринг, щоб перетворити вашу анімацію на готове відео. Це бере всі ваші моделі, текстури, освітлення та анімацію та перетворює їх у серію кадрів, які можна відтворити. Залежно від якості та складності, цей крок може зайняти трохи часу, але результатом буде ваша гладка, фінальна анімація!
Стоп-моушн: Магія кадр за кадром

Стоп-моушн — це унікальна техніка анімації, де ви створюєте рух, фотографуючи об'єкти кадр за кадром. Ви трохи переміщуєте об'єкт між кожним знімком, і коли ви швидко відтворюєте зображення, здається, що він рухається сам по собі. Це як оживити ляльку або фігурку з глини!
Ця техніка використовується у всьому, від клеймейшн (як Уоллес і Громіт) до стоп-моушн фільмів та реклами. Це може бути трудомістким, але результати варті того, надаючи чарівний, ручної роботи вигляд.
Ось детальні кроки для створення Стоп-моушн:
- Налаштуйте свою сцену: Виберіть міцний, ненав'язливий фон, що підходить для вашої історії. Простий фон або надрукований задній план працює чудово. Зберіть своїх персонажів і реквізит — це можуть бути фігурки з глини, паперові вирізки, іграшки або будь-що, що можна переміщати кадр за кадром. Закріпіть камеру на штативі або стабільній поверхні, щоб уникнути тремтячих знімків.
- Розмістіть свій об'єкт: Розмістіть свого персонажа або об'єкт у початковій позі, переконавшись, що він розташований послідовно в кожному кадрі. Злегка переміщуйте об'єкт між знімками, щоб створити плавний рух. Невеликі, контрольовані рухи роблять анімацію більш плавною. Якщо використовуєте глину або фігурки, використовуйте липку масу або дроти, щоб допомогти утримувати позиції та запобігти їх падінню.
- Робіть фотографії: Захоплюйте кожен кадр за допомогою камери, смартфона або програмного забезпечення для стоп-моушн. Переконайтеся, що освітлення залишається однаковим протягом усього процесу, щоб уникнути мерехтіння. Використовуйте дистанційний затвор або таймер, щоб мінімізувати рух камери. Будь-яке невелике тремтіння може зробити вашу анімацію нестабільною. Регулярно переглядайте свої кадри, щоб перевірити потік анімації та вносити корективи, якщо це необхідно.
- Редагуйте свої кадри: Імпортуйте всі свої фотографії в програмне забезпечення для стоп-моушн, таке як Dragonframe, Stop Motion Studio або iMovie. Налаштуйте швидкість відтворення, щоб відповідати стилю руху — зазвичай 12 до 24 кадрів на секунду (FPS) створюють плавну анімацію. Видаліть небажані кадри, налаштуйте таймінг і застосуйте переходи, якщо це необхідно.
- Додайте звук та ефекти: Додайте звукові ефекти, що відповідають рухам персонажів — такі як кроки, шелест одягу або фонові шуми. Додайте фонову музику, щоб підсилити настрій і загальне враження від анімації. Якщо потрібно, застосуйте корекцію кольору та візуальні ефекти, щоб відполірувати фінальний вигляд.
Графіка руху: Дизайн у русі

Графіка руху — це тип анімації, який зосереджений на створенні рухомих елементів графічного дизайну. Це не про те, щоб оживити персонажів, як у 2D або 3D анімації, а більше про те, щоб змусити текст, логотипи, форми або абстрактні дизайни рухатися та взаємодіяти один з одним. Ви бачите це в таких речах, як титульні послідовності у фільмах, рекламах і навіть у пояснювальних відео. Це веселий і творчий спосіб оживити статичні візуальні елементи та передати повідомлення з енергією та стилем!
Ось детальні кроки для створення 2D графіки руху:
- Плануйте свою концепцію: Почніть з визначення мети вашої графіки руху. Це для промоції бренду, пояснювального відео чи контенту для соціальних мереж? Накресліть сторіборд або грубу ідею того, як будуть виглядати візуальні елементи. Це допоможе вам організувати своє повідомлення. Визначте стиль і тон — чи буде це елегантно та професійно, грайливо та яскраво, чи щось зовсім інше?
- Створіть свої активи: Дизайнуйте ключові елементи, такі як текст, іконки, логотипи та ілюстрації, використовуючи програмне забезпечення, таке як Adobe Illustrator або Photoshop. Переконайтеся, що кожен актив створено в шарах, щоб їх можна було легко анімувати пізніше. Наприклад, якщо анімуєте персонажа, розділіть руки, ноги та риси обличчя. Виберіть кольорову схему та стиль шрифту, що відповідають вашому бренду або темі проекту для послідовності.
- Анімуйте елементи: Імпортуйте свої активи в програмне забезпечення для анімації, таке як Adobe After Effects або Blender. Використовуйте ключові кадри для контролю руху — поступово змінюючи положення, масштаб, обертання або прозорість для створення плавних переходів. Експериментуйте з полегшенням руху (наприклад, ease-in, ease-out), щоб зробити рухи природними та динамічними. Додайте спеціальні ефекти, такі як сяйво, тіні або розмиття руху, щоб підвищити візуальну привабливість.
- Додайте звук: Фонова музика задає настрій, будь то енергійний, драматичний або заспокійливий. Виберіть щось, що підходить до атмосфери вашої анімації. Звукові ефекти (SFX) оживляють анімацію — такі як свисти для переходів, хлопки для з'являючогося тексту або легкі фонові звуки. Синхронізуйте аудіо з візуальними елементами, щоб дії ідеально співпадали з ритмом або ключовими моментами.
- Уточнення та експорт: Перегляньте вашу анімацію кілька разів, щоб відточити темп і згладити будь-які незграбні переходи. Відрегулюйте час, щоб він відповідав ритму аудіо, забезпечуючи відшліфований і професійний потік. Експортуйте ваше фінальне відео у відповідному форматі (MP4 для вебу, MOV для високоякісного використання, GIF для соціальних мереж).
Анімація за допомогою ШІ: Технології зустрічаються з творчістю

Анімація за допомогою ШІ — це коли штучний інтелект допомагає прискорити процес анімації або зробити його більш ефективним. Замість того, щоб малювати або створювати кожен кадр вручну, ШІ може автоматично генерувати проміжні кадри, додавати рух до статичних зображень або навіть допомагати з виразами обличчя та синхронізацією губ.
Це як мати супер-розумного асистента, який бере на себе рутинні завдання, щоб ви могли зосередитися на творчій стороні. Інструменти ШІ все ще розвиваються, але вони вже змінюють правила гри для аніматорів, роблячи процес швидшим і доступнішим.
Ось короткий посібник зі створення анімації за допомогою ШІ:
- Виберіть свій інструмент ШІ: Почніть з вибору інструменту ШІ, який підходить для вашого проекту, наприклад, Runway ML або Adobe Firefly. Вони можуть спростити ваш робочий процес, допомагаючи з такими завданнями, як генерація фону, автоматизація анімації, покращення зображень і навіть пропозиція творчих ідей дизайну.
- Завантажте свої активи: Вам знадобляться готові до роботи дизайни персонажів або сцени. Завантажте їх у програмне забезпечення ШІ.
- Дайте ШІ зробити свою магію: ШІ може допомогти згенерувати проміжні кадри, додати реалістичні рухи або навіть анімувати на основі вашого вводу.
- Уточніть анімацію: Хоча ШІ виконує багато важкої роботи, вам все одно потрібно буде відточити анімацію, щоб вона виглядала ідеально.
- Експортуйте та завершіть: Коли все виглядає гладко, експортуйте вашу анімацію та додайте будь-які фінальні штрихи, такі як звук або ефекти.
Поради щодо створення анімації
Анімація персонажів: оживлення історій
Анімація персонажів — це все про те, щоб персонажі здавалися живими і сповненими особистості. Це ключ до розповіді історій, допомагаючи цифровим творінням з'єднуватися з аудиторією. Подумайте про культових персонажів, таких як Міккі Маус або Шрек — вони не лише візуально розроблені, але й мають унікальну особистість, яка проявляється через їхні рухи та вирази.
Щоб зробити персонажів незабутніми, вам потрібно зрозуміти принципи дизайну, які резонують з глядачами. Елементи, такі як чіткі силуети, сильна привабливість і виразність, відіграють велику роль у створенні персонажів, які виділяються.
Силует і привабливість
По-перше, чіткий силует є надзвичайно важливим. Він допомагає персонажу виділятися і бути впізнаваним миттєво, навіть в абстрактних формах. Наприклад, силует Бетмена є знаковим з його загостреними вухами і плащем, що робить його впізнаваним здалеку. Привабливість — це те, що привертає людей до вашого персонажа — це те, що змушує глядачів хотіти дивитися і піклуватися про них. Подумайте про те, як Пікачу має простий, милий і відразу ж привабливий дизайн. Ви хочете, щоб ваш персонаж мав цю особливу чарівність, яка залучає аудиторію в історію.
Виразність і анімація обличчя
Коли справа доходить до анімації обличчя, магія відбувається в деталях. Невеликі зміни в очах, роті та бровах можуть передати цілий спектр емоцій. Подивіться, як Саллі з "Корпорація монстрів" має тонкі зміни у виразах обличчя — його очі передають тепло, гумор або навіть здивування, додаючи шари особистості персонажу.
Ключем є використання таких технік, як blend shapes і morph targets, щоб зробити ці переходи між виразами плавними. Коли ви освоїте це, ви зможете змусити вашого персонажа емоційно з'єднуватися з аудиторією.
Ріггінг і механіка тіла
Рігінг — це те, що створює каркас для руху вашого персонажа. Це як побудова цифрового скелета, який аніматори використовують для створення реалістичних дій. Наприклад, у "Холодному серці" рігінг Ельзи дозволив їй виконувати складні рухи — такі як створення снігових бур або льодової магії — залишаючись плавною та переконливою. З хорошим рігінгом ви можете контролювати кожну частину тіла вашого персонажа, забезпечуючи, щоб вони рухалися саме так, як ви хочете.
Механіка тіла зосереджується на тому, щоб рухи вашого персонажа виглядали обґрунтованими та переконливими. Спостерігаючи за рухами в реальному житті та розуміючи такі речі, як вага та баланс, ви можете забезпечити, щоб рухи вашого персонажа виглядали автентично. Наприклад, ВОЛЛ-І має свій унікальний стиль руху, який відображає його особистість і функцію, роблячи його як зрозумілим, так і переконливим.
Локомоція та Таймінг
Нарешті, таймінг — це все, коли йдеться про анімацію дій, таких як ходьба або біг. Кожен крок і жест повинні відчуватися реальними. Подивіться на Блискавку МакКвіна з "Тачок" — його рухи на гоночній трасі не лише реалістичні, але й сповнені особистості. Це означає, що потрібно звертати увагу на те, як тіло рухається природно, розуміти, як зміщується вага, і застосовувати правильний таймінг.
Правильне виконання цього допомагає зробити рухи персонажа переконливими, змушуючи аудиторію відчувати, що вони є частиною світу, який ви створили. Синхронізуючи рухи персонажа з правильним темпом, ви створюєте досвід, який відчувається життєвим.
Зосереджуючись на цих техніках — рігінгу, анімації обличчя та механіці тіла — ви можете створювати персонажів, які не лише візуально вражають, але й емоційно залучають, додаючи глибини вашій розповіді. Подивіться на персонажів з фільмів, таких як "Історія іграшок", де кожен рух, вираз і дія служать для поглиблення емоційного зв'язку з аудиторією, роблячи їх незабутніми.
Висновок
На завершення, створення анімації у 2025 році полягає у використанні правильних технік, інструментів та креативності для втілення ваших ідей у життя. Незалежно від того, чи занурюєтеся ви у 2D, 3D або стоп-моушн, кожен тип анімації має свій унікальний процес, але всі вони починаються з надійного планування, візуального сторітелінгу та уваги до деталей. Ключем є оволодіння основами, а потім експериментування з тим, що найкраще підходить для вашого проекту.
Якщо ви замислюєтеся, як створити анімацію, все починається з розуміння основ і розширення меж вашої креативності. Тож, незалежно від того, чи тільки починаєте ви, чи прагнете підвищити свої навички, пам'ятайте, що анімація — це подорож. Продовжуйте практикуватися, залишайтеся натхненними і не бійтеся пробувати нове. Світ анімації постійно розвивається, і з правильними техніками ви готові залишити свій слід!