Embark on a creative journey as we explore the seamless fusion of Meshy Text to Texture with Blender, unlocking new possibilities for 3D model enhancement. In this tutorial, we'll guide you through the effortless integration of Meshy and Blender, providing a step-by-step walkthrough to elevate your scene creation.
Looking to streamline your Blender workflow even further? Learn how to download and utilize our plugin, providing added convenience and efficiency. Discover the possibilities of creating scenes in various styles with the seamless integration of Meshy and Blender.
Step-by-Step Guide to Using Meshy-for-Blender
1. Download and Install Meshy-for-Blender
To begin, download the Meshy-for-Blender plugin.
2. Register a Meshy Account
Next, you'll need to register for a Meshy account. This will allow you to access all of Meshy's features and integrate them seamlessly with Blender.
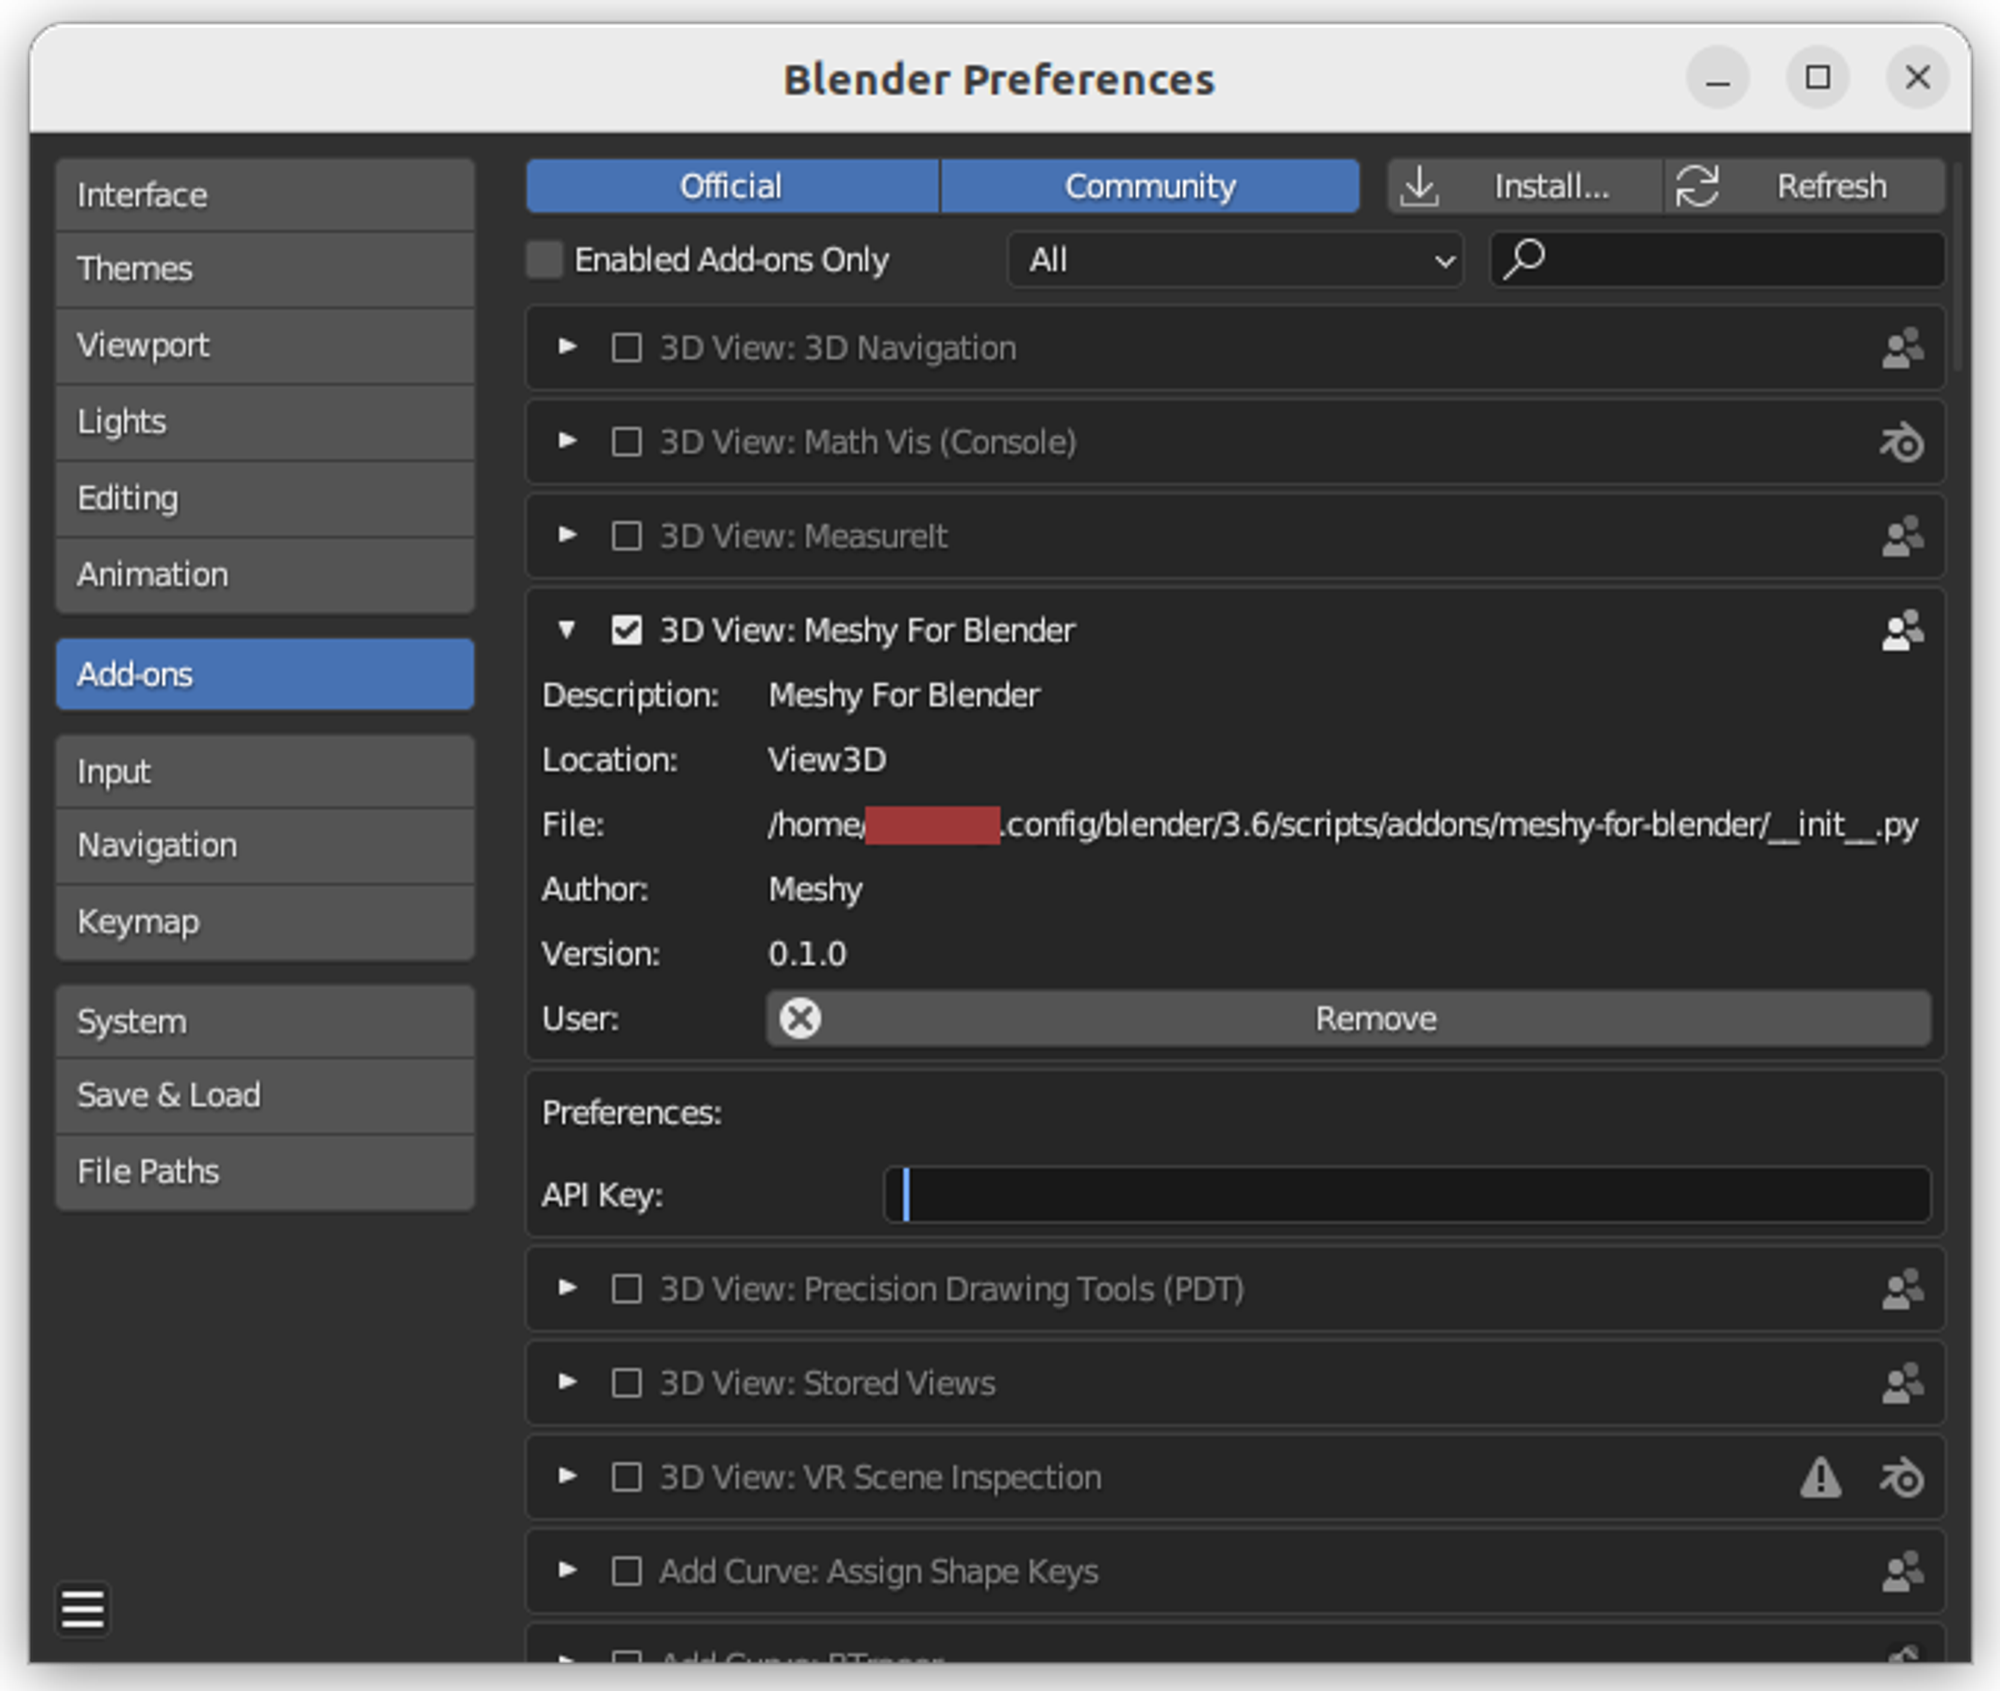
3. Create and Save an API Key
Follow the instructions on the Authentication page to create and save your API key. This key is essential for connecting Blender to Meshy and utilizing the texturing capabilities.
4. Generate Stylized Texture in Blender
First, in Blender editor, please select the Edit → Preferences → Add-ons → Install option from the menu bar to install Meshy-for-Blender. After installing and enabling the add-on, enter the API Key in the add-on management interface and press Enter to save.
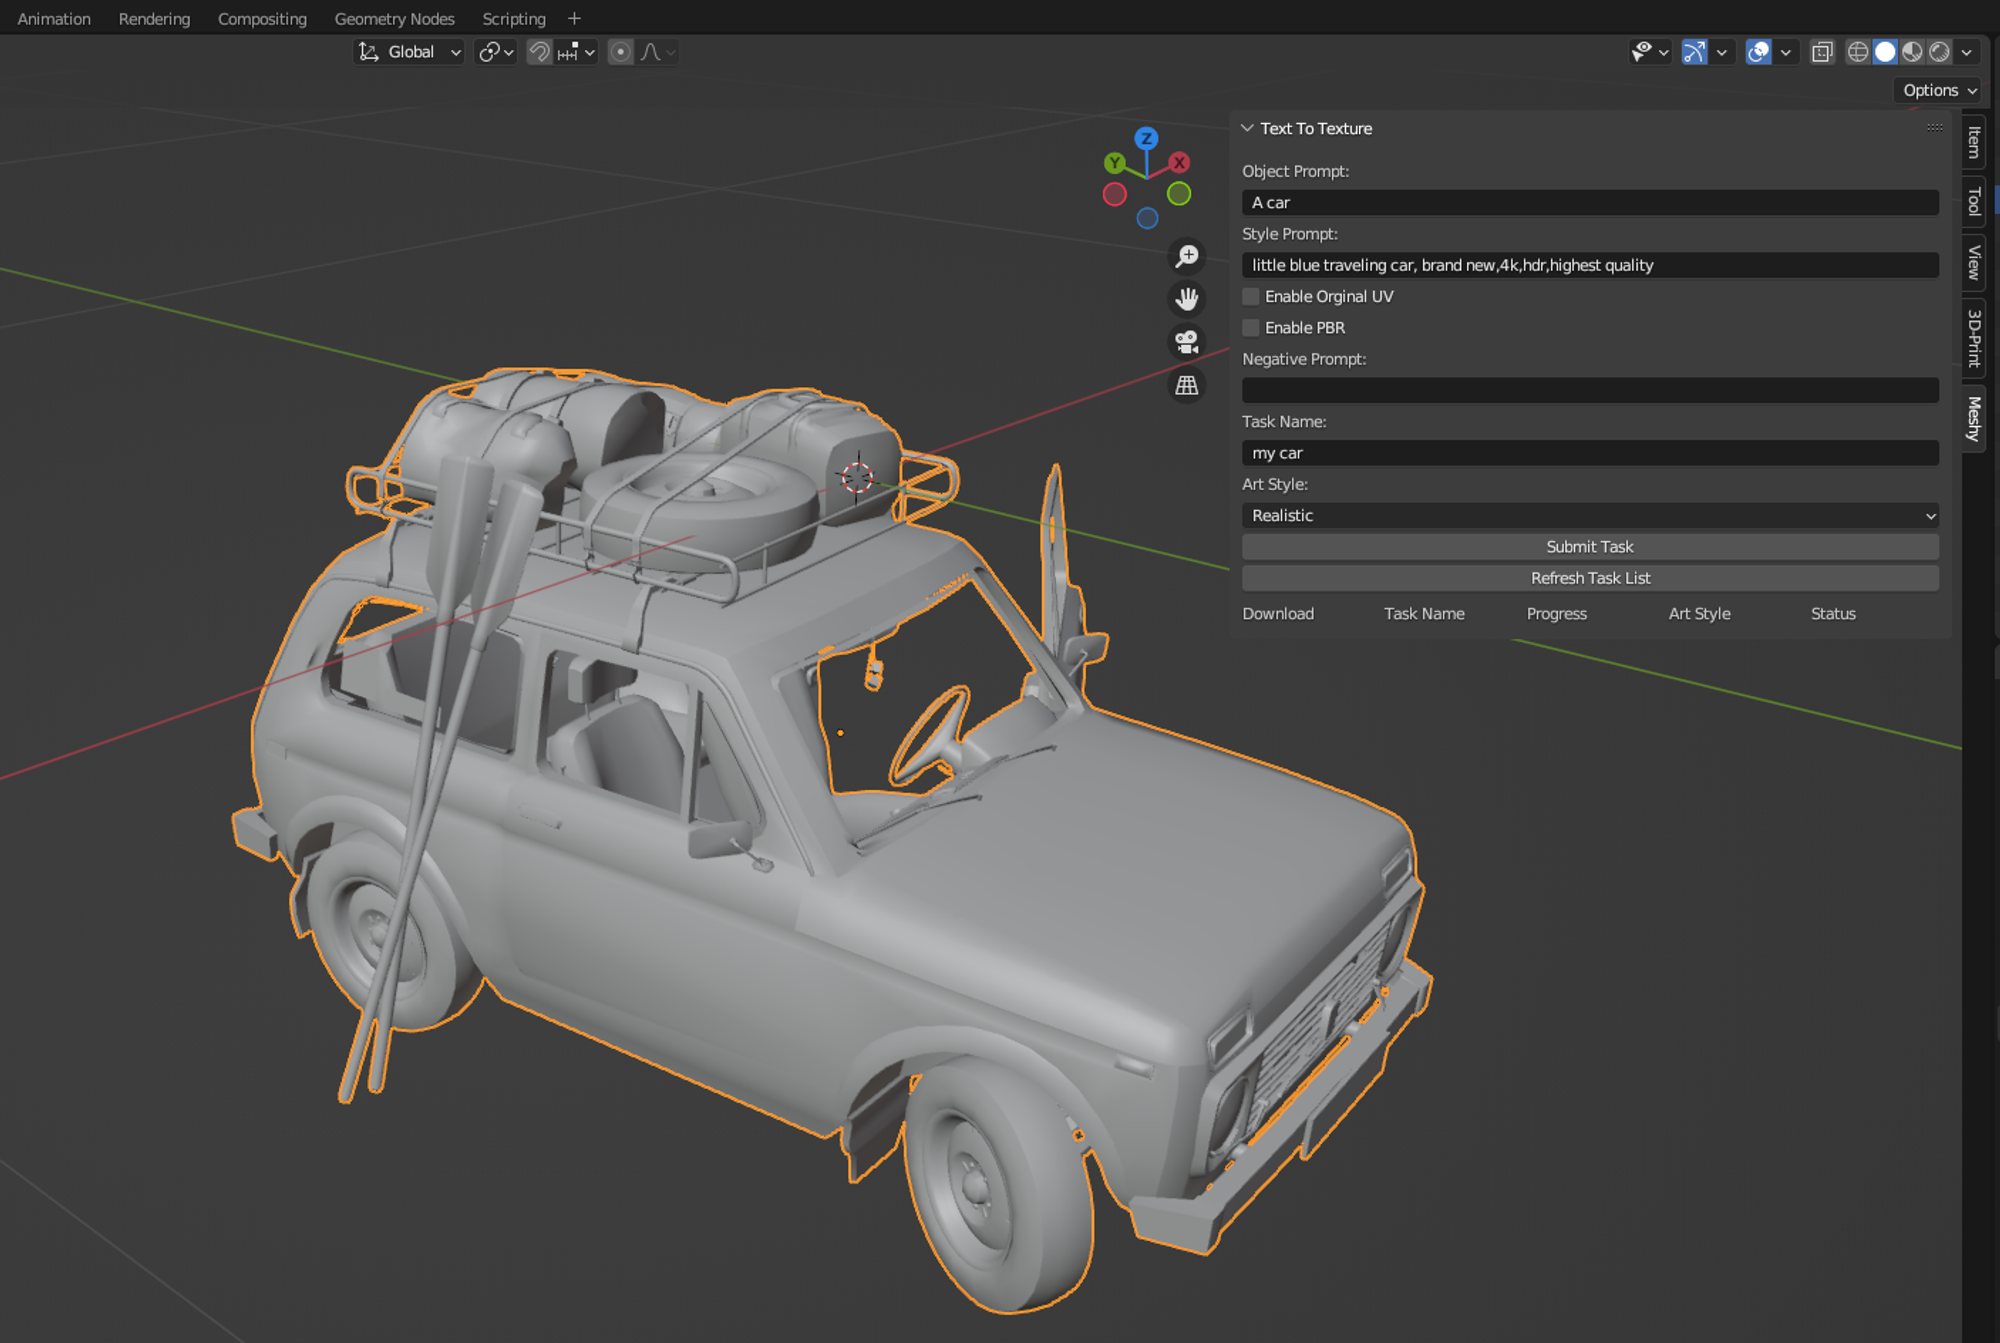
In Object Mode, press the N key to expand the sidebar in the upper right corner of the viewport. In the sidebar, select "Meshy" to open the Text to Texture window interface.
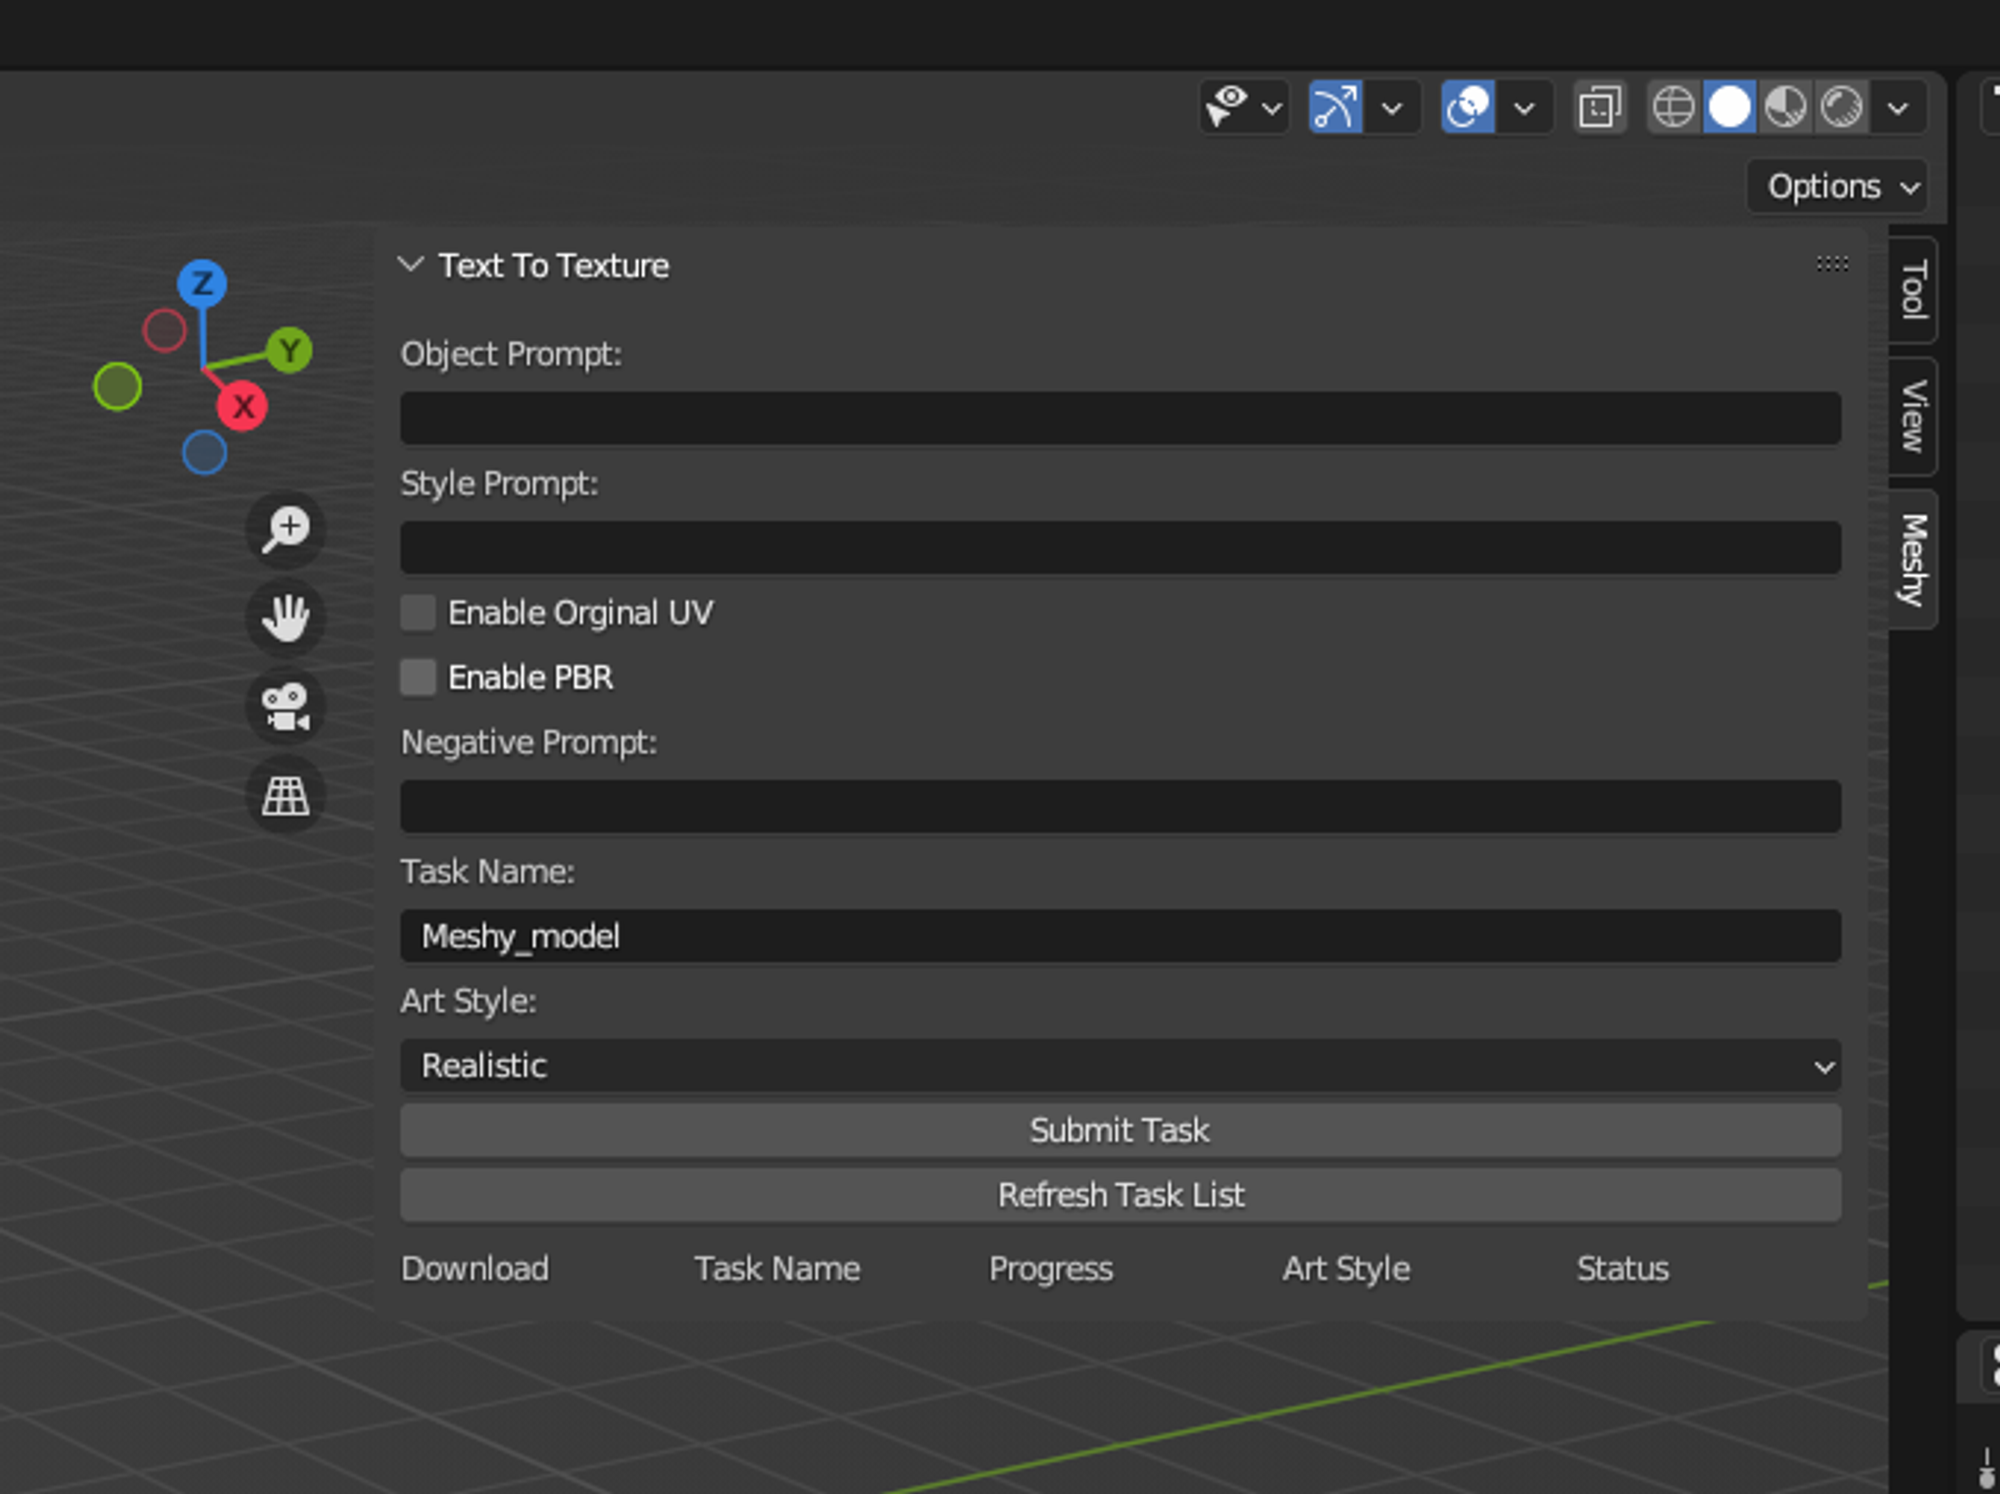
Next, we can generate textures for the model. Let's take the car model as an example. We select the model we want to texture, then in the Text to Texture interface, enter the text prompt. For example:
- Object Prompt:
A car - Style Prompt:
little blue traveling car, brand new, 4k, hdr, highest quality
Then click the "Submit Task" button to submit the task.
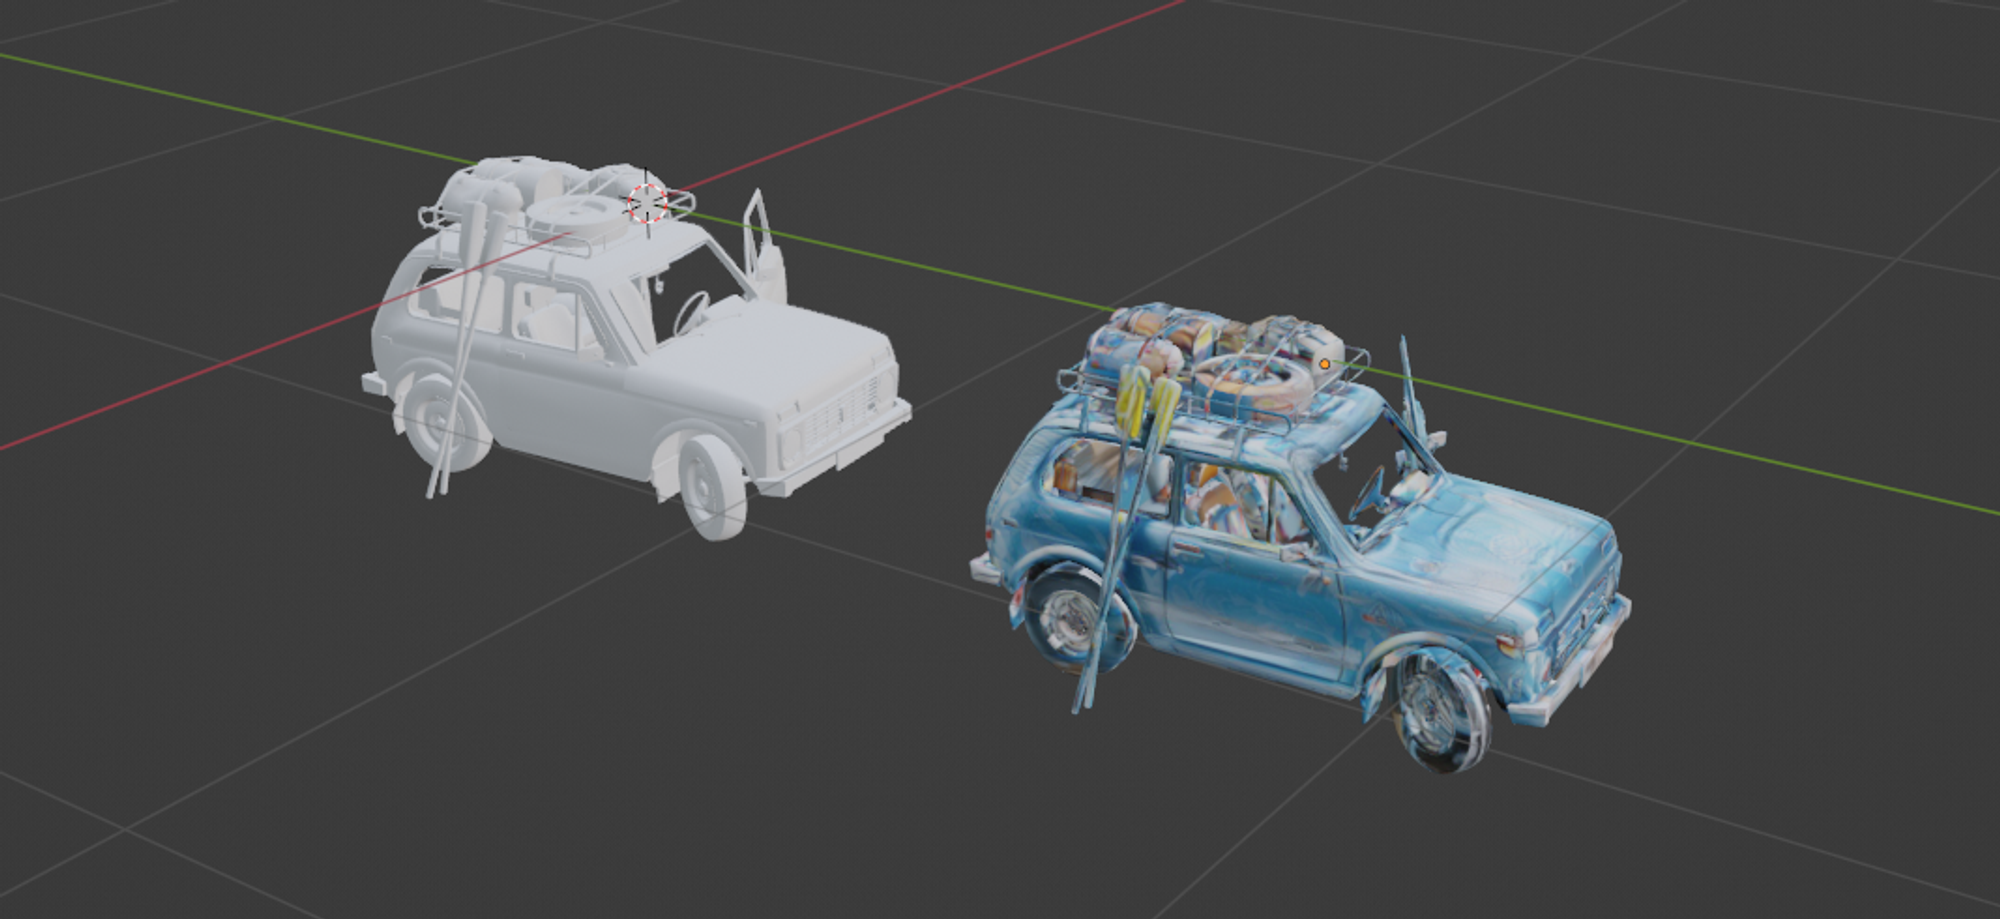
After submitting the task, you can click the "Refresh Task List" button to refresh the task status. Once the task is completed, you can click the "Download" button to download the new model. Finally, we can see the model with textures in the scene!
Conclusion
By following these steps, you can easily integrate Meshy with Blender to create stunning, stylized 3D models. Whether you're a beginner or an experienced user, Meshy's Text to Texture feature simplifies the process of applying unique textures to your models, enhancing Blender 3D models and bringing your creative vision to life.